Your stainless coffee pot looks acceptable until you pour the first cup. The coffee smells stale, there's a chalky patch near the bottom, and a quick rinse hasn't changed much. Scrubbing harder is tempting, but the right fix depends on whether you're dealing with coffee oil, mineral scale, burnt residue, or a heat-related rainbow tint.
Knowing how to clean a stainless coffee pot starts with choosing the right cleaner, not the strongest one. Use detergent for oily deposits, a compatible mild acid for scale, and soft tools throughout. Give the lid and pouring mechanism as much attention as the bowl, because a spotless interior won't help if every cup passes through a dirty spout.
Match the Residue Before You Soak
Coffee oils, mineral scale, burnt film, and rainbow tint aren't the same problem. A universal vinegar soak can leave greasy residue behind, while detergent alone won't remove a chalky mineral crust. Identify what's on the surface before filling the pot with anything.
Stainless cookware manufacturer Cristel's maintenance guidance distinguishes everyday washing from treatments for deposits and discoloration, while emphasizing compatible cleaners and careful rinsing. That's the useful approach for a coffee carafe too: match the chemistry to the deposit and keep abrasion out of the process.
Which mess needs which cleaner
| Problem | What you see or taste | Cleaner | Time and tool |
|---|---|---|---|
| Coffee oils | Brown slick film and stale smell | Mild dish detergent in warm water | Work until the slick film lifts with a soft sponge or nylon brush, then rinse |
| Mineral scale | White haze or chalky crust | Mild food-grade citric-acid solution | Use the measured soak below, without boiling, then rinse thoroughly |
| Burnt residue | Dark film stuck to the wall | Warm soapy water soak | Let the residue soften before using a nonmetallic pad |
| Rainbow tint | Thin colored bands, not grime | Citric acid or compatible diluted white vinegar | Brief contact, full rinse, then dry open |
| Sour odor in seams | Bowl looks clean but still smells | Detergent; acid only if scale is also present | Brush the lid, spout, and removable gasket with soft nylon bristles |
Brown, slick residue usually calls for detergent first. Water alone may remove loose coffee, but it doesn't reliably clear the oily coating around the waterline or beneath the lid. If you can feel a greasy drag with a clean fingertip, don't jump straight to descaling.
White, rough deposits suggest mineral scale. Acid is useful here because the problem isn't grease. A dark, firmly attached patch needs a different start: soften it in warm soapy water before brushing, rather than grinding at it while it's dry.
Separate discoloration from dirt
Rainbow bands can look alarming without being a layer of grime. A thin, smooth tint generally needs less intervention than a rough crust or sticky coffee film. Try a brief, manufacturer-compatible acid treatment rather than a more abrasive scrubber.
Practical rule: Natural doesn't mean harmless, and stronger doesn't mean more suitable for stainless steel.
Salt scrubs, harsh powders, and wire wool introduce risks without solving the residue diagnosis. Finish your inspection with a clean-water rinse and a white-cloth wipe. Brown or black transfer means coffee film remains; a persistent white haze points toward scale.
Gather Supplies and Safety Rules
Set out your tools before you wet the pot. A brush that reaches the bottom shoulder and pouring channel is more useful than a cupboard full of cleaning products.
Build a small cleaning kit
- For the bowl: A soft sponge, nonabrasive nylon pad, or nonmetallic bottle brush.
- For narrow parts: A slender, soft nylon brush for lid seams, hinges, and the spout.
- For checking and drying: A clean white cloth, soft towel, and drying rack.
- For washing: Warm water and mild dish detergent.
- For descaling: Food-grade citric acid, a kitchen scale, and a measuring jug.
- For the final flush: Clean water and a separate vessel to collect it.
Check the manual for removable parts and dishwasher permissions. Unplug an electric pot and let it cool before handling its base or cleaning around electrical connections.
Keep unsuitable cleaners out
Never use chlorine bleach, hydrochloric-acid products, oven cleaner, salt paste, steel wool, or abrasive metal pads. Don't mix acid with bleach or salt-containing cleaners, and don't store acidic cleaning solution inside the pot.
Avoid plunging a hot vessel into cold water. Keep a vacuum-insulated pot out of a sinkful of water unless its manufacturer explicitly allows immersion, because the exterior assembly and seals may have different limits from the stainless interior.
Ordinary washing also isn't interchangeable with sanitizing or disinfecting. For a useful explanation of those separate jobs, compare cleaning, sanitizing, and disinfecting from Maid in America before choosing a stronger product for a shared kitchen. Removing deposits comes first; a disinfectant isn't a shortcut around dirty surfaces.
Wash the Pot and Its Hidden Parts
Start with the ordinary wash, even if the pot looks bad enough to need descaling. Removing coffee film lets you see what's underneath and prevents you from treating grease as though it were mineral scale.
Tefal's stainless-steel care guidance supports warm soapy water and nonabrasive tools for routine cleaning. The important trade-off is simple: soaking takes patience, but hard scrubbing can leave scratches that make later cleaning harder.
Wash the interior methodically
- Cool and empty the pot. Let it reach room temperature, then discard leftover coffee and grounds. Don't send a load of grounds down the drain.
- Rinse with warm water, rotating the pot so water reaches the shoulder beneath the opening.
- Add warm water and a small squirt of mild detergent. You need enough to loosen oil, not a bowl overflowing with foam.
- Clean the walls, bottom, and waterline with a soft sponge or nonmetallic bottle brush. Sweep around the bottom edge where the wall meets the base.
- If dark film stays attached, leave it in warm soapy water until it softens. Return with a nonabrasive nylon pad rather than increasing pressure.
- Rinse until no suds remain. Pour rinse water through the spout as well as out of the main opening.
- Wipe an accessible area with your white cloth. Wash any spot that leaves brown or black transfer.
- Dry reachable surfaces with a clean towel, then leave the lid off until the interior is fully dry.
Keep the basic sequence simple, then spend your attention on the parts that are easy to miss.
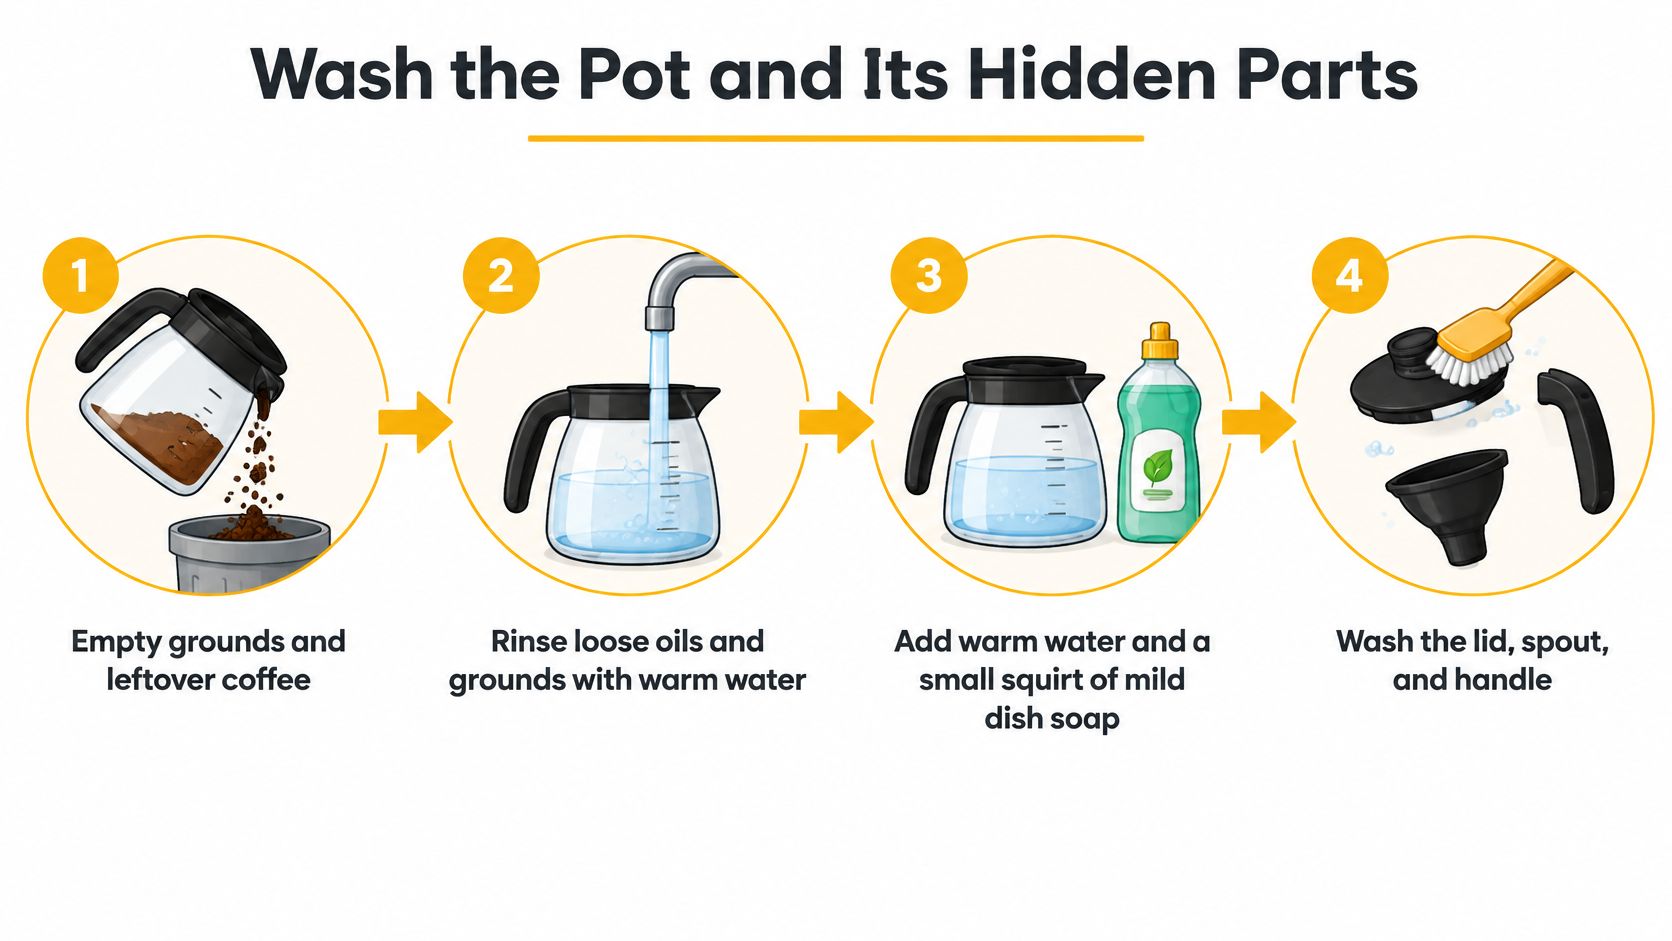
Don't use a sudden cold rinse to speed up cooling. Thermal shock can distort thin components, and there's no cleaning advantage to taking that risk. Likewise, a quick splash rinse won't substitute for brushing a dried coffee ring.
Clean the route the coffee takes
Remove only the pieces the manufacturer designed to come off. Depending on the pot, that may include the lid, gasket, filter basket, spout screen, or a removable pouring insert. Don't pry apart a sealed lid because a seam looks accessible.
Brush the underside of the lid, around the hinge, and through the pouring channel with warm detergent solution. Operate a removable pouring mechanism while rinsing so clean water reaches its moving surfaces. Keep electrical parts dry and respect any restrictions on running water.
Deposits deserve attention beyond appearance. Rational's professional equipment care guidance explains that accumulated deposits can restrict air contact at the stainless surface and contribute to corrosion conditions. That's a reason to remove buildup gently, not a reason to use harsher chemicals.
Inspect gaskets and vacuum-insulated bodies
Wipe both faces of a removable gasket and clean its seating groove. Look for cracks, distortion, sticky residue, or a smell that persists after washing and drying. Replace a damaged or persistently sour seal with the correct part rather than trying to mask the odor.
For a vacuum-insulated carafe, clean the coffee-contact chamber, not the space between the walls. Don't attempt to open the vacuum assembly or force water into exterior seams. If liquid appears to have entered a sealed body, stop using it and ask the manufacturer about replacement.
A clean bowl with a chalky haze or smooth rainbow tint needs a compatible descaling treatment. It doesn't need another round of forceful scrubbing.
Descale With a Mild Citric Acid Soak
Use an acid soak when the washed interior still feels gritty, shows white haze, or has stubborn mineral-related discoloration. Flavor alone isn't a complete diagnosis, but dull coffee alongside visible scale gives you a good reason to descale.
The same gentle approach applies whether you're treating the bottom of a carafe or an accessible stainless surface.
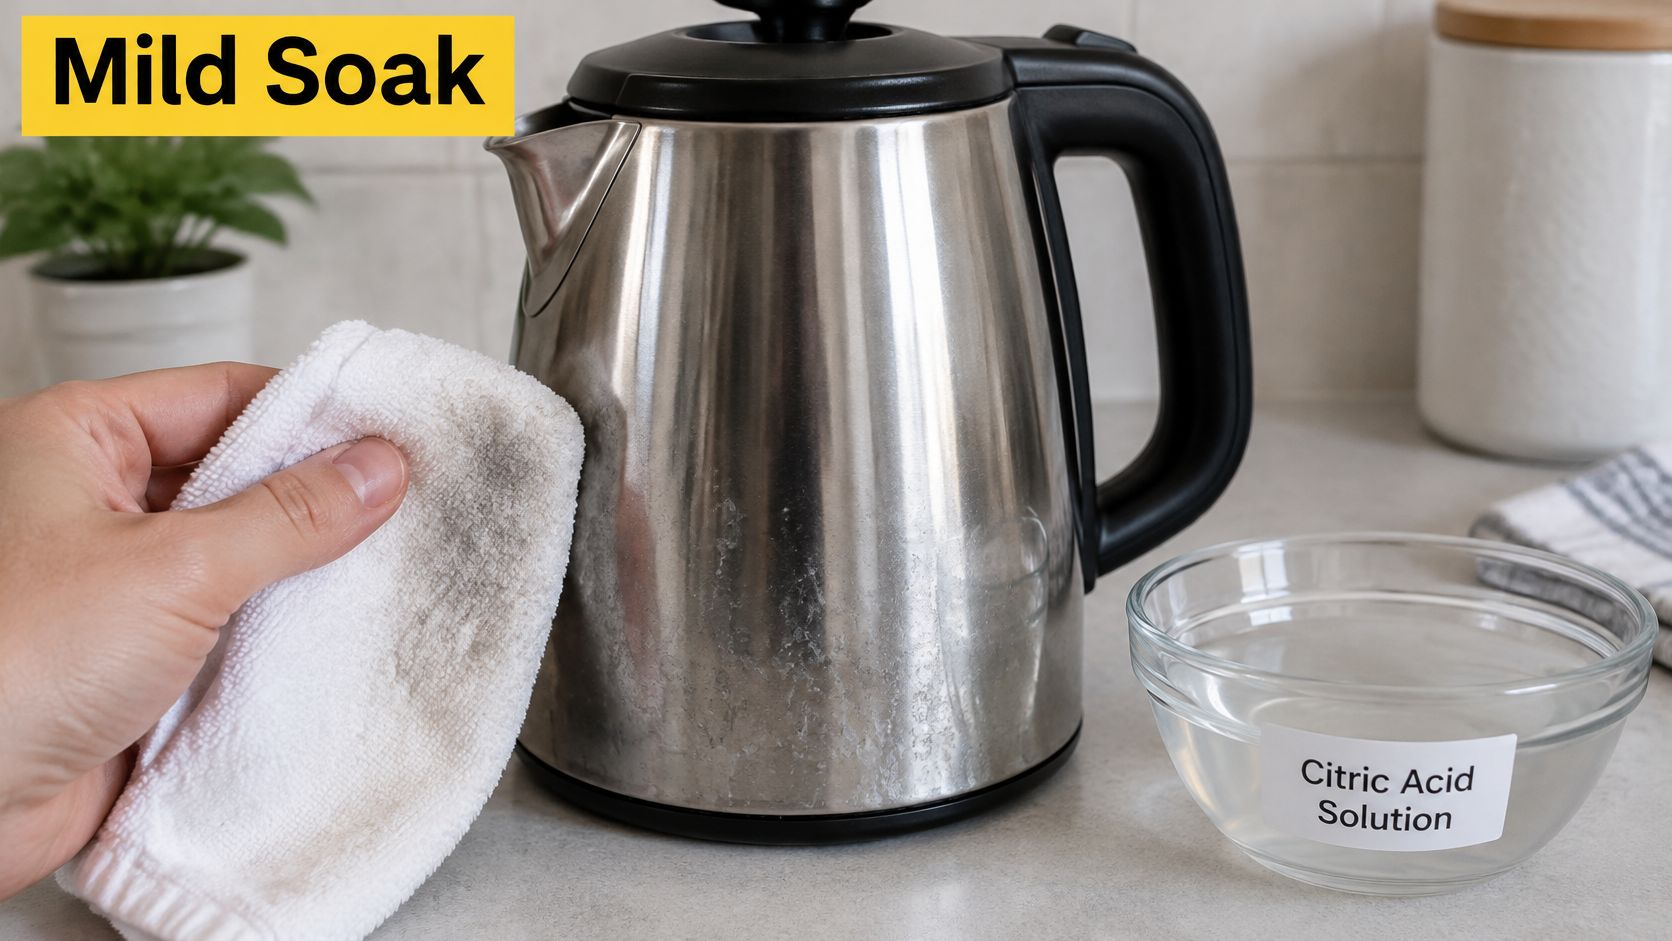
Measure the solution rather than guessing
The British Stainless Steel Association's citric-acid guidance describes 5–10% citric-acid solutions for cleaning and passivation and identifies 304 and 316 stainless steel as suitable for most citric-acid handling applications. For a manufacturer-compatible household pot, start conservatively with 50 g food-grade citric acid per 1 L water, approximately a 5% solution, allow 15–30 minutes without boiling, and rinse at least twice.
- Rinse before adding acid. Use hot clean water, within the maker's temperature limits, to clear loose debris and potential chloride contamination.
- Mix the measured solution in a separate jug. Dissolve the powder before filling the pot, and prepare only enough to cover the affected stainless surface.
- Allow controlled contact. Set a timer for the recommended soak rather than leaving the pot unattended overnight. Don't boil the solution.
- Agitate loosened deposits with a soft brush. Work around the bottom edge without scraping.
- Empty, rinse thoroughly, and leave the pot open to dry.
If deposits remain, repeat the treatment once rather than raising the acid strength. Keep acid away from incompatible lid components, decorative finishes, and seals unless their care instructions permit contact.
For an additional visual reference, this video accompanies the cleaning process.
Judge the result, not the fizz
There's no reliable universal success rate for this treatment. Deposit thickness, water hardness, alloy, temperature, and contact time all affect how readily scale releases. Your useful checks are a smooth interior, no lingering odor, and clear final rinse water.
Diluted white vinegar is a backup when the manufacturer permits it, but don't assume every vinegar product has the same strength. Use the maker's dilution guidance and rinse until no vinegar odor remains. Never combine acid with another cleaner to make it more powerful.
For a shared office kitchen, choosing cleaners for repeat facility use from Facility Management Insights offers broader product-selection context. Keep stainless compatibility, clear dosing instructions, and easy rinsing ahead of natural branding.
Campers can pack labeled food-grade citric-acid powder and a soft brush instead of improvising with a harsh descaler. If the brewer itself also needs attention, use a separate coffee-maker cleaning routine; treating the carafe doesn't clean the machine's internal water path.
Fix Stains Odors and Rainbow Marks
A brown ring at the waterline usually means the brush missed a band of dried coffee oil. Soak that area in warm detergent solution and work directly on it. Don't subject the entire pot to stronger chemistry for a localized stain.
A sour smell needs a different inspection. Remove the lid and smell the dry bowl and lid separately, then check the gasket and pouring channel. That simple separation helps you find the dirty component instead of repeatedly washing the wrong surface.
Leftover pot problems and the fix
| Symptom | Likely cause | Fix |
|---|---|---|
| Brown ring at the waterline | Dried coffee oil | Warm soapy soak and a nylon brush on that band |
| Smell after the bowl looks clean | Oil in the spout, gasket, or hinge | Brush removable channels and replace a persistently sour seal |
| White film returning soon after cleaning | Hard brewing water | Descale sooner and use water treated to reduce hardness |
| Rainbow color still there | Light scale or heat tint | Repeat the mild acid treatment without abrasive scrubbing |
| Metallic taste after descaling | Possible cleaner residue | Rinse again and discard a plain-water fill before brewing |
| Tiny dark pits | Possible corrosion damage | Stop unsuitable cleaners and replace the pot if damage progresses |
Returning white crust isn't evidence that you need a stronger acid. It often means your brewing water continues to supply minerals. A filter that improves taste won't necessarily reduce hardness, so check what your water-treatment product removes.
For lingering stains, using vinegar on coffee stains can help you distinguish another compatible treatment from an unnecessary escalation. Keep the surface material in mind rather than transferring every fabric or countertop cleaning trick to a carafe.
Know when the surface is damaged
Stainless steel resists corrosion through its protective passive surface, but it isn't immune to unsuitable chemistry. A study in Portugaliae Electrochimica Acta found that increasing chloride and hydrogen-peroxide concentrations increased corrosion rates in tested alkaline peroxide solutions. Those industrial tests aren't household soak instructions, but they reinforce the value of compatible, chloride-free cleaning.
A pit is missing metal, not a stain waiting for a tougher scrubber.
Tiny dark marks deserve inspection under good light after washing and drying. Don't assume every spot is corrosion, but don't keep polishing a depression either. Replace a pot with progressing pits, a leaking vacuum assembly, or inaccessible contamination you can't remove.
A metallic taste immediately after cleaning can indicate incomplete rinsing, but it isn't proof that acid remains. Flush with clean water, then fill with plain hot water and discard it. Only boil water in a pot designed for direct heating; persistent off-taste after thorough rinsing warrants further inspection.
For exterior streaks, the two-cloth method for streak-free stainless steel from Sweet Home Cleaning Service is useful: clean with a damp cloth, then dry with a separate clean cloth. Keep exterior polish out of the food-contact interior.
Set a Rhythm and Brew the Next Cup
Empty and rinse after every use. Wash the interior and lid daily when the pot is used regularly. Descale when deposits become visible or begin affecting flavor. That's a workable household rhythm without assigning every kitchen the same arbitrary descaling calendar.
The goal is to interrupt buildup before it becomes a restoration job. Fresh residue washes away more readily than dried coffee film, and an open, dry pot is easier to inspect than a damp one stored with the lid tightened.
Rinse now, wash today, descale when you can see it or taste it.
Use food-service guidance in context
The FDA's 2022 Food Code generally calls for food-contact surfaces associated with foods requiring time and temperature control to be cleaned at least every 4 hours, while enclosed beverage equipment is cleaned at the manufacturer's frequency or often enough to prevent soil or mold accumulation. These are rules for regulated food establishments, not a household coffee-pot cleaning law.
The useful lesson for home is that beverage equipment needs a deliberate routine, including the components you don't see while pouring. Don't apply the food-service interval indiscriminately to a domestic pot, and don't interpret a clean-looking bowl as permission to ignore a dirty lid.
In an office, make the responsibility explicit. Whoever empties the last coffee should also rinse the vessel and leave removable parts open to dry. At camp, carry enough clean water to rinse properly rather than treating detergent residue as an unavoidable compromise.
Make the next cup your quality check
Before brewing, inspect the dry interior under good light and smell the lid separately. The surface should feel smooth, the cloth should stay clean, and there shouldn't be a stale odor hiding in the pouring mechanism.
Then prepare a fresh cup. If it still tastes wrong, check the water, coffee freshness, and brewer rather than immediately repeating the acid treatment. A clean carafe removes a source of off-flavor; it doesn't correct every brewing problem.
Build the cleaning tools into your everyday coffee setup. Keep the bottle brush within reach, leave space for the lid to dry, and store the descaler with clear instructions rather than loose in an unmarked container. A routine you can perform without hunting for supplies is the one you're more likely to keep.
Cartograph Coffee offers organic instant coffee for home, work, and camping, where a clean vessel still matters to the finished cup. Visit Cartograph Coffee to explore convenient coffee options for your freshly cleaned pot or travel kit.