You pour the first coffee of the morning, take a sip, and notice something's wrong. The beans are the same, the recipe hasn't changed, but the cup tastes flat, stale, or faintly sour. Before replacing your coffee, inspect the machine. Coffee oils, trapped grounds, mineral scale, and damp hidden surfaces can all change how a familiar brewer performs.
Learning how to clean a coffee maker means matching the method to the problem. Residue removal, descaling, and sanitation aren't interchangeable jobs, and a drip brewer needs different care from a pod machine, French press, espresso machine, percolator, or camping brewer. The routine below separates those tasks, respects manufacturer instructions, and gives you a schedule based on water hardness, use, and machine design.
A Better Cup Starts With a Cleaner Machine
A well-used coffee maker often gives warning before it gives up. The carafe sits with a brown film around the base, the filter basket feels slick, and the reservoir develops a smell that wasn't there when the machine was new. The coffee still looks normal as it pours, yet the finish has lost its brightness.

That flavor change doesn't automatically mean the coffee beans are stale. Roasted coffee oils cling to plastic, glass, and stainless steel, while mineral deposits can restrict water movement and affect the brewing path. A neglected reservoir deserves special attention because independent home-safety reporting based on NSF findings found yeast and mold in half of the tested coffee-maker reservoirs, with coliform bacteria in about one in ten. See this practical explanation of why coffee can taste bitter when you're troubleshooting the cup.
Cleaning protects more than flavor
A clean carafe won't remove scale from an internal heating path. A vinegar cycle won't wash away oily coffee residue from a basket, and rinsing the tank with water won't necessarily clean the pod needle or the surfaces around it. Each action has a target.
Practical rule: If the coffee tastes stale, wash the coffee-contact parts first. If brewing slows or white deposits appear, investigate scale. If the reservoir smells or feels slippery, treat it as a separate hygiene problem.
Routine care also helps you notice mechanical changes early. A slower flow, a sputtering outlet, or water collecting where it shouldn't can point to buildup or a part that needs inspection. Cleaning isn't a cosmetic ritual. It keeps the surfaces that touch coffee free from old oils, helps water travel through the intended route, and reduces the chance that a small maintenance issue becomes an unpleasant brewing problem.
A routine you can actually maintain
Busy households don't need a complicated laboratory protocol. They need a short after-use habit, a more thorough wash of removable parts, and a descaling routine that follows the machine manual and the home's water conditions. Campers and travelers need one extra safeguard, dry storage, because a damp collapsible brewer or travel mug can develop odors quickly.
The most reliable approach is simple: identify the cleaning job, choose the correct method for the brewer, rinse thoroughly, and let parts dry before reassembly. That sequence produces better results than running the same vinegar recipe through every machine in the kitchen.
Know the Cleaning Job Your Coffee Maker Needs
Most cleaning confusion comes from treating every problem as “scale.” Coffee makers usually need three different kinds of care: residue removal, descaling, and deep cleaning of surfaces that can hold biofilm or stale material. The distinction matters because each problem responds to a different tool.
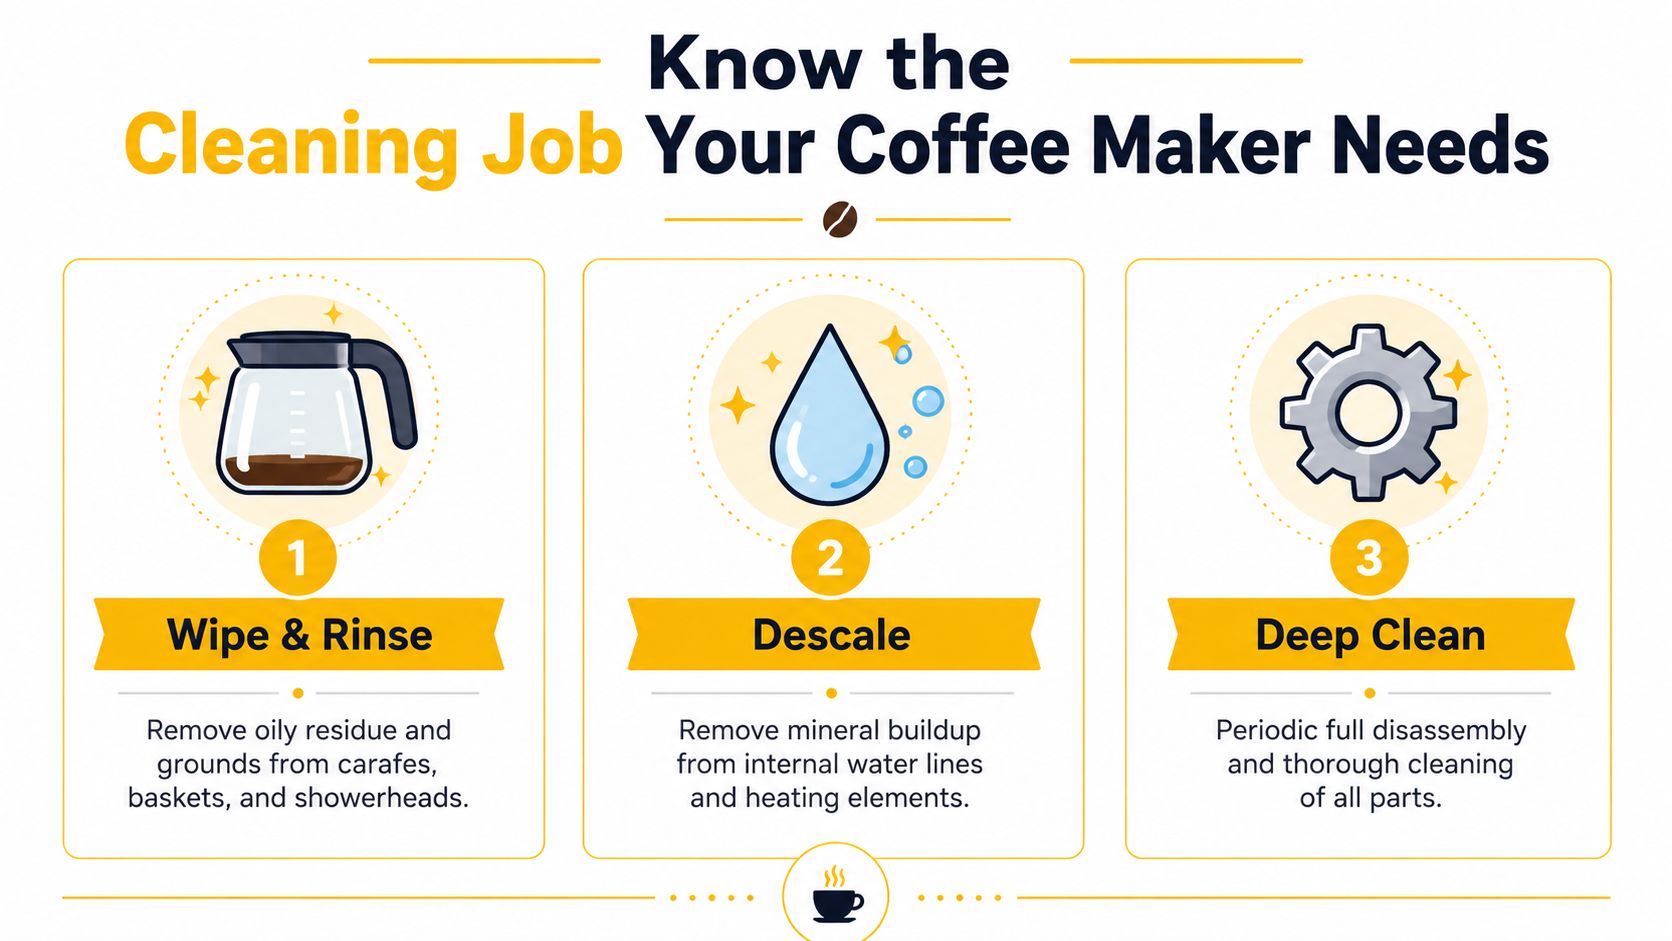
Residue removal
Coffee oils collect on carafes, filter baskets, showerheads, portafilters, screens, and drip trays. Grounds can lodge under a basket or around a pod chamber. Warm water helps loosen fresh material, but a mild dish soap and a soft brush work better on greasy deposits.
This is the job to choose when the machine brews at its usual speed but the coffee tastes dull, bitter, or stale. Wash removable coffee-contact parts separately from the internal water path. Wipe fixed surfaces with a damp cloth, and never flood an electrical housing.
Descaling
Mineral scale forms inside water lines and around heating components. Hard water accelerates the problem, while filtered or soft water generally slows it. Descaling uses an acidic solution approved for the appliance, such as the manufacturer's product, citric-acid solution, or vinegar only where the manual allows it.
Choose descaling when you see white deposits, notice slower flow, or detect a faint mineral or metallic note. The solution must travel through the machine, dwell long enough to work when the instructions call for it, and then be flushed with plain water. A rinse is not optional because leftover acid can affect taste and continue acting on internal components.
Deep cleaning and sanitation
A reservoir, pod chamber, seal, steam wand, milk frother, or drip tray can hold damp residue even after a descaling cycle. Vinegar may help with mineral buildup, but it doesn't replace soap-and-water washing of removable parts or targeted cleaning of biofilm-prone surfaces. Emptying and rinsing a reservoir daily, washing removable parts with soap, and scheduling periodic descaling are separate actions recommended in guidance on cleaning coffee makers.
Your dominant need depends on three variables:
- Water hardness: Mineral-heavy water calls for closer attention to scale and shorter descaling intervals.
- Usage intensity: A machine brewing throughout the day accumulates coffee oils and moisture faster than one used occasionally.
- Machine design: Pod brewers concentrate residue around needles and chambers, espresso machines add group heads and milk systems, and manual brewers expose more parts for direct washing.
Watch the machine before choosing a recipe. A greasy carafe points to washing. White deposits and restricted flow point to descaling. Odor, slime, or damp hidden surfaces point to disassembly and sanitation.
Clean Every Common Coffee Maker Safely
The safest cleaning routine starts with the owner's manual. Manufacturers differ on descaling chemistry, removable parts, cleaning modes, and whether vinegar is acceptable. Unplug electrical equipment before wiping or disassembling it, and never submerge a powered base, grinder body, pump housing, or other electrical component.
Drip coffee makers
Start by removing the paper filter, spent grounds, carafe, brew basket, and any removable reservoir. Wash the carafe and basket in hot soapy water, using a soft bottle brush around the spout and corners. Wipe the showerhead, drip area, warming plate, and accessible lid surfaces with a damp cloth, taking care not to push grounds into the outlet.
For descaling, follow the appliance instructions. A practical sequence for a compatible drip machine is a 1:1 white-vinegar-and-water solution through a full brew cycle, followed by two to three fresh-water cycles to remove acidity and odor, as described in this coffee-maker cleaning guide. Some appliance guidance calls for letting the solution sit for about 15 minutes, then rinsing with plain water at least three times. Don't use vinegar if the manual prohibits it.
The main failure is under-rinsing. The machine may look clean while acidic residue remains in the reservoir, lines, or carafe. If the first post-cleaning brew smells sharp, continue with plain-water cycles and don't add coffee until the water runs neutral.
For a deeper explanation of washing the vessel itself, use this guide to clean a coffee carafe.
Single-serve pod and K-Cup machines
Remove the reservoir, lid, drip tray, pod holder, and any detachable funnel. Wash those parts with mild dish soap, rinse them fully, and air-dry them. Wipe the pod chamber and surrounding surfaces rather than spraying liquid into the machine.
The entrance and exit needles need targeted care. Use the cleaning tool supplied with the machine, or follow the manual's approved method for clearing coffee particles. A water-only run may flush the line, but it won't wash greasy residue from the pod chamber or clean the needle area. Descale the internal path with the manufacturer's solution and complete every required fresh-water rinse.
Pod machines often look tidy because the used capsule leaves the housing quickly. That doesn't mean the reservoir, seals, or chamber are dry and clean. Empty unused water when the machine will sit, leave detachable parts open to air, and inspect the drip tray for trapped coffee.
French press
A French press is easier to clean thoroughly because the parts are accessible. Separate the lid, plunger, filter screens, spring, and cross plate according to the design. Rinse grounds into the trash rather than the sink, then wash the glass or stainless vessel and the plunger assembly with warm water and mild dish soap.
Brush the filter mesh from both sides. Fine particles and coffee oils can hide between the layers, so a narrow dish brush or soft toothbrush is more useful than a quick rinse. If the press has developed a persistent smell, soak compatible glass and stainless parts in warm water with a small amount of baking soda, then wash and rinse them thoroughly. Don't use abrasive pads on polished stainless steel or delicate glass.
Dry every piece before reassembly. Trapped moisture under the plunger or around the lid can create the stale smell that many people mistakenly blame on the coffee.
Espresso machines
Espresso equipment has several cleaning jobs, and a descale cycle handles only one of them. After brewing, knock out the puck, rinse the portafilter and basket, wipe the group-area surfaces, and run clean water through the group head. Use the machine's approved detergent and backflushing procedure when the manual calls for it.
Soak the portafilter and metal basket as directed, keeping handles and electrical parts out of the solution unless the manufacturer says otherwise. Clean the group screen and gasket carefully. A blocked screen changes water distribution, while old coffee oils can make a fresh shot taste harsh.
Milk equipment needs immediate attention. Purge the steam wand after steaming, wipe it while residue is still soft, and clear the steam tip if flow becomes weak. Remove and wash milk jugs, frothing attachments, and removable tubes according to the machine's instructions. Replace water filters or softeners on the schedule specified by the manufacturer, and descale according to water hardness and the machine's indicator rather than applying a generic vinegar recipe.
Stovetop percolators
Separate the lid, stem, basket, spreader, and gasket if the design permits. Wash coffee-contact parts with mild dish soap and a non-abrasive brush, paying close attention to the basket holes and the tube opening. Coffee oils collect around the underside of the lid and the basket's rim.
For mineral buildup, use a descaler approved for the pot's material. Older aluminum percolators can react poorly to aggressive or unsuitable acids, so the manual and material guidance matter. Don't immerse a base or electrical cord on an electric model.
Dry the pot fully before storage, especially around the stem and gasket. A closed, damp percolator can develop an odor even when the visible surfaces look polished.
Portable camping and travel brewers
Collapsible drippers, hand-pump espresso makers, travel presses, and insulated mugs need a travel-friendly routine. Empty grounds immediately, rinse away coffee particles, and disassemble silicone, mesh, plunger, and cup components as far as the design allows. Wash with mild soap when you have access to it, then rinse until no cleaner remains.
At camp, a thorough rinse is better than sealing wet gear in a bag. Towel-dry the parts, leave them separated while possible, and pack only after surfaces are no longer holding visible moisture. At the destination, run a clean-water rinse through pump-based brewers before brewing if the equipment has been stored for a while.
| Coffee Maker Type | Daily / After-Use Care | Deep Clean & Descale | Key Cautions |
|---|---|---|---|
| Drip | Remove grounds, wash basket and carafe, wipe showerhead and warming plate | Use the approved descaler, complete the full cycle, then flush with fresh water | Don't use vinegar when the manual prohibits it, and don't under-rinse |
| Pod or K-Cup | Empty pod, rinse reservoir, wipe chamber, inspect needles and drip tray | Wash removable parts and run the manufacturer's descaling program | Water-only cleaning doesn't replace needle and chamber care |
| French press | Discard grounds, rinse vessel and plunger | Separate the filter, brush mesh, wash, and deodorize compatible parts | Keep grounds out of the drain and avoid abrasive tools |
| Espresso | Rinse group, portafilter, and basket, purge and wipe steam wand | Backflush, soak approved metal parts, clean milk system, descale as directed | Never submerge electrical parts, and clean milk residue immediately |
| Stovetop percolator | Rinse lid, basket, stem, and pot | Scrub the assembly and use material-compatible descaler | Aggressive acids can damage some aluminum cookware |
| Portable gear | Empty grounds, rinse, separate parts, and dry | Deep-soak washable components and inspect seals and mesh | Don't pack wet gear or immerse pump and electrical components |
For a broader hygiene checklist that includes hidden areas and maintenance habits, consult this cleaning coffee makers 2026 guide. Use it as a supplement, not a replacement for the manual supplied with your particular machine.
Build a Cleaning Schedule That Fits Your Routine
A fixed monthly rule sounds convenient, but it can be wrong in both directions. Recent guidance places drip-machine descaling at every one to three months on hard water and every three to six months on soft or filtered water, with the interval also affected by use and machine type, as outlined in this coffee-gear maintenance guide. A lightly used brewer on soft water may not need the same treatment as a heavily used machine supplied by mineral-rich water.
Use a three-tier rhythm
After brewing, remove the paper filter or grounds, empty the carafe, rinse the basket, and wipe visible splashes. If the lid and reservoir can remain open safely, let them air-dry rather than trapping moisture.
During the week, wash removable parts with mild dish soap. Give extra attention to the reservoir, pod chamber, drip tray, plunger mesh, portafilter, steam wand, and milk attachments. A weekly deep clean is especially sensible for machines that handle milk or brew repeatedly throughout the day.
Periodically, descale the internal water path with the approved solution. Hard water, high daily use, white deposits, slower flow, and a faint metallic taste all justify moving the appointment closer. Soft or filtered water and occasional brewing may support a longer interval, but the manual's indicator and instructions take priority.
Let the machine tell you
A calendar helps, but physical cues are more useful. White scale on the reservoir or outlet suggests minerals. A longer brew or weaker flow suggests restriction. A sour, stale, or oily taste after washing the carafe points you toward the internal path or showerhead.
A practical household rhythm might look like this:
- Daily: Rinse the carafe and basket after the last cup, empty standing water, and leave washable parts open to dry.
- Weekly: Clean one overlooked component, such as the reservoir lid, pod needle area, drip tray, filter mesh, or steam tip.
- Seasonally: Review the descaling indicator, water conditions, and usage pattern, then run the approved descaling process when due.
That structure keeps maintenance small enough to repeat. For more ideas on choosing a low-maintenance brewer, see this guide to an easy-to-clean coffee machine.

Use Natural Cleaners Without Creating New Problems
“Natural” doesn't mean universal. Vinegar, citric acid, baking soda, and dish soap each solve a different problem, and the wrong choice can leave odor, residue, or material damage behind.
White vinegar is an acid that can dissolve mineral scale in compatible drip machines. It can also leave a strong smell and taste if the machine isn't flushed thoroughly. Citric acid is another descaling option when the manufacturer permits it, but concentration and compatibility still matter. The manual's approved product wins over a household recipe.
Baking soda belongs mainly in the residue and deodorizing category. It can help scrub or freshen compatible glass and stainless components, but it isn't a substitute for an approved internal descaler. Don't assume that putting baking soda into a water path will remove scale safely or effectively.
Mild dish soap is the dependable choice for removable carafes, baskets, reservoirs, plunger parts, and travel mugs. It removes coffee oils where an acid cycle won't. Rinse until the water and surfaces are free of suds, then dry parts before reassembly.
The useful question isn't “Which cleaner is strongest?” It's “What deposit am I trying to remove, and what materials will it touch?”
Espresso machines need particular caution around gaskets, seals, group heads, boilers, and milk systems. Older aluminum percolators may be vulnerable to unsuitable acids. Some pod-machine manuals prohibit vinegar, so follow the model-specific cleaning instructions rather than copying a drip-brewer formula.
| Coffee Maker Type | White Vinegar | Citric Acid | Baking Soda | Mild Dish Soap |
|---|---|---|---|---|
| Drip | Use only if approved; flush thoroughly | Often suitable when the manual allows it | Better for removable-part deodorizing than internal scale | Best for carafe, basket, and reservoir |
| Pod or K-Cup | Avoid when the model manual prohibits it | Use the supplied or approved descaler | Don't put it through the internal path unless instructed | Use on removable parts and wipeable surfaces |
| French press | Usually unnecessary for routine care | Usually unnecessary for routine care | Useful for compatible glass and stainless deodorizing | Preferred for vessel and plunger |
| Espresso | Don't improvise through the machine | Use only with manufacturer approval | Not an internal descaler | Use for removable coffee-contact parts as directed |
| Stovetop percolator | Material-dependent, especially with aluminum | Material-dependent and manual-dependent | Suitable for gentle deodorizing of compatible parts | Preferred for lid, basket, stem, and pot |
| Portable gear | Usually unnecessary | Use only if the manufacturer permits it | Useful for compatible cups and presses | Best for washable silicone, steel, glass, and plastic parts |
Whatever cleaner you choose, rinsing protects the next cup. Complete the required plain-water cycles, wash removable parts separately, and don't brew coffee until chemical odor has disappeared. Vinegar can help dissolve scale, but it doesn't sanitize every surface or remove every coffee oil deposit, so no single natural cleaner replaces a complete maintenance routine.
Keep Your Coffee Maker Fresh Between Deep Cleans
Good maintenance happens in the small pauses around brewing. Empty the carafe promptly instead of letting old coffee sit on the warming plate. Rinse the basket, discard grounds, and wipe splashes before they dry into a sticky film.

Leave the lid or filter-basket area ajar overnight when the design allows it, so damp surfaces can air-dry. Wipe the warming plate after it cools, because spilled coffee can bake into a burnt film. For pod machines, remove the used capsule and check the drip tray rather than letting water and coffee collect under the chamber.
Travel gear needs a stricter packing habit. Disassemble collapsible drippers, hand-pump espresso makers, presses, and travel mugs, rinse away grounds, towel-dry the pieces, and avoid sealing them wet in a case. At the campsite or hotel, run a clean-water rinse through any brewer that has been stored since the last use.
Shared kitchens benefit from a visible maintenance record. Put a small descaling note inside the cabinet or use a recurring calendar reminder, then record the machine, the solution used, and the date. That prevents everyone from assuming someone else handled it.
The rule is easy to remember: rinse today, wash parts this week, descale this season.
Cartograph Coffee makes organic instant coffee for busy mornings, workdays, travel, and camping, so you can keep the coffee routine simple without giving up flavor. Visit Cartograph Coffee to explore convenient coffee designed for home and life on the move.