Brewing a fantastic cup of coffee at home is a whole lot simpler than you might think. Forget the image of a counter cluttered with expensive gear; the real secret lies in getting a few basics right. We're talking about the coffee-to-water ratio, the ideal water temperature, and a little bit of technique.
This guide will walk you through everything, starting with a surprisingly great cup from high-quality instant coffee and even diving into some clever equipment-free methods.
Why Home Brewing Is Easier Than You Think
Let's be honest, the whole idea of "home brewing" can feel a bit intimidating. Maybe you're picturing a complicated espresso machine with a dozen dials or one of those pour-over setups that looks like a science experiment. While those can make great coffee, they're just one small part of the picture. Learning how to brew at home is really about taking back control and making a cup you genuinely love.
You don't need a barista certificate to make satisfying coffee. The truth is, great brewing is built on a few simple principles that anyone can get the hang of with stuff you already have in your kitchen. This guide is here to cut through the noise and show you that cafe-quality coffee is completely within your reach.
Shifting Your Brewing Mindset
First things first, let's reframe what "brewing" actually means. It's not just about the fancy gadgets; it’s about the simple process of extracting flavor from coffee. Once that clicks, a whole new world opens up. You'll start looking at your kettle, a saucepan, or even a glass jar as perfectly good brewing tools.
Our journey starts with the easiest, most convenient option out there: premium instant coffee. Brands like Cartograph Coffee have totally changed the game, delivering a rich, nuanced flavor that can go head-to-head with a fresh brew. By starting with instant, you can focus entirely on getting your ratios and water temperature right without worrying about grind size or brew times. It's the perfect way to build your skills.
The secret to exceptional coffee at home isn't in expensive machinery. It's in understanding the simple variables—water, coffee, and technique. Master these, and you can make a great cup with almost anything.
What You Will Learn
From there, we'll get into some clever, equipment-free methods that are all about being resourceful. Throughout this guide, the focus is on practical advice that gives you better coffee, right away.
You'll discover how to:
- Nail the coffee-to-water ratio for the exact strength you like.
- Get the water temperature just right (without a fancy kettle) to avoid a bitter taste.
- Use high-quality instant coffee to whip up quick, delicious drinks.
- Brew amazing coffee with regular grounds using common household items.
- Boost the flavor with a few simple, creative tricks.
This is all about building confidence. By the end, you won't just be following a recipe; you'll understand why certain things work. That's the knowledge that lets you adapt, experiment, and consistently make a cup of coffee you truly love, no matter where you are or what you have on hand.
Mastering the Fundamentals: Ratio and Temperature

Before you even think about fancy grinders or elaborate brewers, let's talk about the two things that will make or break your coffee: the ratio of coffee to water and the temperature of that water. Honestly, getting these two right is the quickest way to gain real control over your brew's flavor and strength.
Think of it like any craft beverage, from tea to beer. People are getting serious about making quality drinks at home, and it all comes down to mastering these simple variables. It's a massive trend—just look at the home beer brewing market. It was valued at around USD 57.6 million in 2025 and is projected to skyrocket to USD 104.85 million by 2034. This just shows how passionate people are about getting the basics right.
Finding Your Golden Ratio
In the coffee world, we often talk about a "golden ratio." It’s a fantastic starting point that gives you a balanced, flavorful extraction, preventing your coffee from being either disappointingly weak or overwhelmingly strong.
A great baseline to start with is 1 part coffee to 15-18 parts water. For a single mug, that’s roughly 1 tablespoon of instant coffee for every 6 ounces (170 grams) of water.
This isn't a hard-and-fast rule, but rather a launchpad for your own experimentation. Your perfect cup is personal, so use this as a guide and tweak it until it’s just right for you.
Once you’ve got the baseline down, the fun part begins: tailoring the brew to your exact taste. This is how you become your own favorite barista.
- Want a stronger morning kick? Tighten the ratio to 1:14. This means using a bit more coffee (or a little less water) to intensify the body and flavor. It's perfect for a bold start to your day.
- Craving a lighter afternoon cup? Widen that ratio to 1:18. Using less coffee relative to the water will give you a milder, more delicate profile that’s not so in-your-face.
When you're starting out, just use a standard kitchen tablespoon and a measuring cup. Consistency is your best friend here. If you find a combination you love, jot it down so you can nail that perfect cup every single time.
Why Water Temperature Is So Crucial
The second key to unlocking amazing flavor is water temperature. One of the most common mistakes I see people make is using water that's way too hot. Pouring boiling water (212°F or 100°C) over your coffee—whether it's instant or ground—will scorch it, leaving you with a bitter, harsh taste. Nobody wants that.
On the flip side, water that’s too cool won't do its job, either. It fails to pull out all the delicious, complex flavors, resulting in a cup that tastes flat, weak, and even a little sour. You're looking for that sweet spot right in the middle.
The Ideal Temperature Range
For the best extraction, you want your water between 195°F and 205°F (90°C to 96°C). This range is the magic zone where the water is hot enough to dissolve the coffee solids and extract all those nuanced flavors without burning them.
You don't need a fancy thermometer kettle to get this right. The easiest trick? Bring your water to a full boil, then just take it off the heat and let it sit for 30 to 60 seconds before you pour. That brief pause is usually all it takes to bring the temperature down into the ideal brewing zone. It’s a simple step that makes a world of difference. To dive deeper into the science, check out our detailed guide on the best water temperature for brewing coffee.
Once you get a handle on both ratio and temperature, you have complete control. For example, if you're making an iced coffee, you'd start with a much stronger brew, maybe a 1:10 ratio, because you know the melting ice will dilute it. By mastering these two fundamentals, you can adapt your technique for any coffee, any time, and always brew a cup that's perfectly tailored to you.
Your Shortcut to a Great Brew: The Instant Coffee Upgrade
Let's be honest, instant coffee has a bit of a reputation. If you're picturing that bitter, dusty stuff from the back of your grandma's cupboard, it's time for a reset. Modern, high-quality instant coffee is a whole different ballgame—we're talking rich, complex flavors that can be ready in less than a minute.
This is your ace in the hole for those moments when you just need a great cup of coffee without the whole song and dance. Whether you're rushing out the door, setting up camp in the middle of nowhere, or just need that afternoon jolt right now, a good instant brew is your best friend.
The Secret to a Perfect Instant Brew
So, what's the one mistake almost everyone makes? Dumping the coffee granules into a full mug of steaming hot water. You end up chasing clumps around with your spoon, and the result is often uneven and bitter.
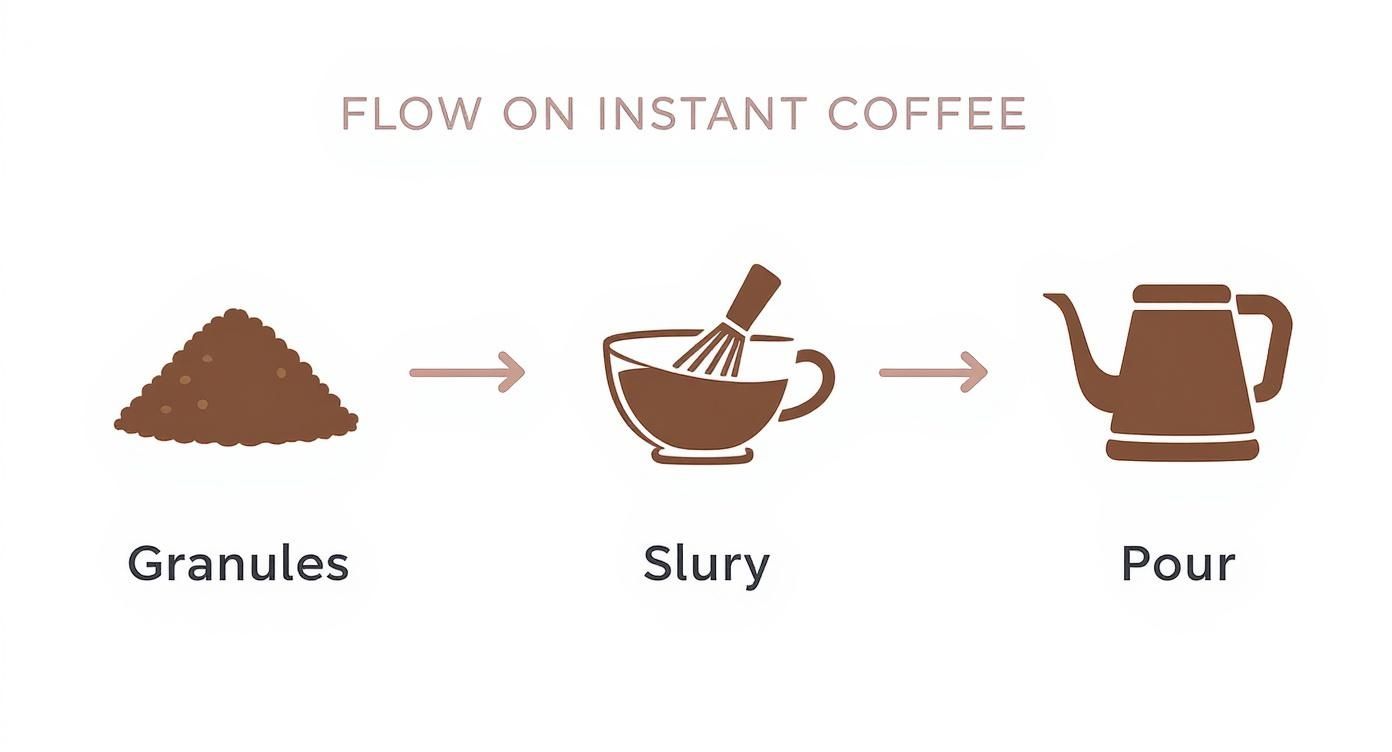
The trick is incredibly simple but makes a world of difference: you need to make a slurry.
Think of it like making hot cocoa from a powder. You don't just dump it all in at once. By first dissolving the coffee granules in just a splash of cool or room-temperature water, you create a smooth, concentrated paste. This ensures every last bit of coffee is fully dissolved before the hot water hits, giving you a consistently smooth and much more flavorful cup.
Here’s how easy it is:
- Add 1-2 teaspoons of instant coffee to your mug.
- Pour in just enough cool water to cover the granules—about a tablespoon is perfect.
- Stir like you mean it until you have a smooth, thick paste with no lumps.
- Now, slowly pour in your hot water (aim for that sweet spot between 195°F and 205°F) and give it a final stir.
This slurry method is the closest thing to a magic trick for brewing at home. It adds maybe ten seconds to your routine but elevates your instant coffee from "just okay" to genuinely exceptional. Every single time.
Quick and Delicious Instant Coffee Recipes
Once you’ve nailed the basic brew, you can start having some real fun. High-quality instant coffee is shockingly versatile and makes a fantastic base for all sorts of drinks.
The 30-Second Iced Latte
Need a cold coffee fix, fast? Instant coffee is a game-changer here because you can skip brewing a hot concentrate and waiting for it to cool down.
- Make a Cold Slurry: In a tall glass, mix 2 teaspoons of instant coffee with 1 tablespoon of cold water until it’s a smooth paste.
- Add Milk: Fill the glass with your favorite milk (oat milk is a fantastic choice).
- Finish it Off: Add a pump of syrup or your go-to sweetener, top with ice, and give it a good stir. Done.
The Frothy Dalgona-Style Coffee
Remember that whipped coffee trend? It took off for a reason—it looks amazing and is incredibly easy to whip up with instant coffee.
- Combine Ingredients: In a small bowl, mix 2 tablespoons of instant coffee, 2 tablespoons of sugar, and 2 tablespoons of hot water.
- Whip It Good: Use a hand mixer or a small whisk and whip for about 3-5 minutes. You’re looking for a light, airy foam that forms stiff peaks.
- Build Your Drink: Fill a glass with ice and milk, then spoon that glorious coffee fluff right on top.
These are just a couple of ideas to get you started. For even more ways to level up your cup, check out these other tips on how to make instant coffee taste better.
Instant Coffee Brewing Methods At a Glance
To help you pick the right approach for any situation, here's a quick cheat sheet comparing these simple methods.
| Method | Best For | Key Technique | Time Required |
|---|---|---|---|
| Hot Brew | A classic, quick cup of coffee | Creating a slurry before adding hot water | ~1 Minute |
| Iced Latte | A fast, refreshing cold coffee | Dissolving in a cold water slurry first | ~30 Seconds |
| Dalgona Coffee | An impressive, frothy treat | Whipping granules, sugar, and water | ~5 Minutes |
Ultimately, learning how to brew at home is all about finding what works for you. With today’s excellent instant coffees, you no longer have to choose between convenience and great taste—you can finally have both.
Brewing Without a Brewer: Equipment-Free Methods
You don't need a counter cluttered with gadgets to make a genuinely satisfying cup of coffee. Sometimes, the best brew comes from a bit of resourcefulness, which is really at the heart of the entire homebrewing culture.
It's a movement that has grown into a major global trend, attracting people who love blending a little science with creativity. In fact, some market research projects the homebrewing systems market could hit USD 2.5 billion by 2027. It's all driven by a passion for making quality drinks right at home.
Learning how to make coffee without a machine taps into that exact spirit. You really only need a few basic kitchen tools and a little bit of know-how to get started.
The Classic Cowboy Coffee Method
This is a time-tested technique that’s perfect for camping trips or those mornings when your coffee maker decides to give up on you. All it takes is a saucepan or pot, water, and your favorite ground coffee. It’s simple, rugged, and surprisingly effective.
Here’s how it’s done:
- Heat Your Water: Add your water to the pot and bring it just to a boil.
- Add the Coffee: Take the pot off the heat and let it cool for about 30-60 seconds. This prevents scorching the grounds. Stir in your coffee—two tablespoons for every eight ounces of water is a solid starting point.
- Steep and Settle: Let the coffee steep for about four minutes, giving it a stir once or twice. After that, let it rest for another minute or two. This is key to letting the grounds settle at the bottom.
When you're ready to pour, just tilt the pot slowly and pour the coffee off the top, leaving the sediment behind. A little splash of cold water can also help the grounds settle faster.
Makeshift Brewing with a Coffee Bag
If you prefer a brew with less grit, the coffee bag method is your best bet. Think of it as creating your own oversized tea bag, but for coffee. This approach gives you more control and a much cleaner cup than cowboy coffee.
You’ll just need a coffee filter, a piece of cheesecloth, or even a clean cotton cloth, plus some string or a rubber band to tie it off.
Pro Tip: If you're using a cloth, go for one with a fine weave to keep the smaller coffee particles from escaping. A medium grind works best here—it gives you great flavor extraction without too much sediment passing through.
Just put your coffee grounds in the center of the filter or cloth, gather the edges into a pouch, and tie it up securely. Let the bag steep in hot water for four to five minutes, just like a tea bag. The longer it sits, the stronger it gets. Before you take it out, give the bag a gentle squeeze to get every last drop of flavor.
For a few more ideas, check out our full guide on how to make coffee without a machine.
Effortless Cold Brew in a Jar
Cold brew is famous for its smooth, low-acid flavor, and the best part is it requires zero fancy equipment. Any glass jar with a lid will do the trick, which makes this one of the most accessible brewing methods out there.
The image below shows a similar principle of simplicity, just applied to instant coffee. It’s a great reminder that great results often come from a few simple, intentional steps.
Making your own cold brew concentrate is just as straightforward:
- Combine: Add coarse-ground coffee and cold, filtered water to your jar. A 1:8 coffee-to-water ratio is a fantastic starting point for a strong concentrate.
- Steep: Give it a gentle stir to make sure all the grounds are wet. Then, seal the jar and let it sit at room temperature for 12 to 18 hours.
- Strain: Once it's done steeping, strain the coffee. You can use a fine-mesh sieve, cheesecloth, or even a coffee filter propped in a funnel.
What you're left with is a potent concentrate you can keep in the fridge for up to a week. To serve, just dilute it with water or milk (a 1:1 ratio is common) and enjoy.
Simple Ways to Elevate Your Home Brew
Once you’ve got your ratios and water temperature dialed in, you’re already making consistently good coffee. That’s a huge win. But now we get to the fun part—the little tweaks that can transform your daily cup from "good" into something truly special.
Don't worry, I'm not about to suggest you buy a bunch of new gear. These are simple, actionable tips that play on the science of flavor. They give you more control over the final taste in your mug.
The Power of the Bloom
If you're brewing with fresh grounds, the bloom is one of the most important techniques you can master. Freshly roasted coffee is full of trapped carbon dioxide (CO2). The moment hot water hits the grounds, that gas makes a run for it, causing the coffee bed to bubble and expand.
This rapid gas release actually pushes water away, preventing it from saturating the grounds evenly. The result? A weak, under-extracted cup. The bloom is how you get that CO2 out of the way first.
- How it works: Just pour enough hot water over your grounds to get them all wet. A good rule of thumb is about twice the weight of the coffee itself.
- What to do: Now, wait. Let it sit for 30 to 45 seconds. You’ll see the grounds swell up and bubble as the gas escapes.
- Carry on: Once the bubbling dies down, just continue with your normal brewing process.
By letting the coffee "breathe" for a moment, you’re clearing the path for the water to do its real job: extracting all that delicious flavor.
Enhancing Flavor with Simple Additions
Beyond your brewing technique, a few simple additions can completely change your coffee experience. Think of these as partners to your coffee, not masks. They should highlight the flavors that are already there.
It might sound bizarre, but a tiny pinch of salt can work wonders, especially if you find your coffee a bit bitter. Salt actually suppresses our ability to taste bitterness, which lets the coffee's natural sweetness come forward. Seriously, just a few grains are all it takes.
Spices are another great way to add a layer of warmth and complexity.
- Cinnamon: A small dash mixed into your grounds before you brew adds a comforting, sweet-spicy note.
- Cardamom: Just a pinch gives the coffee an exotic, almost floral aroma that goes incredibly well with medium roasts.
- Nutmeg: A light dusting brings a cozy, aromatic quality that’s just perfect for a chilly morning.
The trick is to start small. A little goes a long way, so experiment until you find what you love.
The Overlooked Ingredient: Water Quality
Here’s a fact that’s easy to forget: your coffee is over 98% water. This means the quality of your water has a massive impact on the final taste. If your tap water has a strong chlorine flavor or is loaded with minerals (hard water), those tastes will absolutely show up in your final brew.
Using filtered water is probably the single biggest and easiest upgrade you can make. A basic charcoal filter pitcher or a filter you attach to your faucet can strip out those impurities, giving you a clean, neutral base. This lets the coffee’s real personality shine through.
This idea of focusing on quality ingredients isn't unique to coffee. It's a driving force in the craft beer world, too. While overall beer sales have dipped, about 49% of small brewers have actually seen their production grow, proving that people value quality. You can find more on these trends over at Craft Brewing Business. Whether you're brewing beer or coffee, it all comes down to the same principle: better ingredients make a better product.
Got Brewing Questions? We've Got Answers.
As you start brewing more at home, questions are bound to pop up. It happens to everyone. Think of this as your go-to spot for clear, no-nonsense answers to those common little problems that can get in the way of a great cup of coffee. Let's tackle some of the big ones.
"Why Does My Coffee Taste So Bitter?"
This is probably the most common complaint I hear, and the culprit is almost always over-extraction. That’s just a fancy way of saying you’ve pulled too much of the bad-tasting stuff out of the coffee grounds.
The good news is that it’s usually an easy fix. A bitter, harsh taste often comes down to one of three things:
- Your water is way too hot. Pouring water that's at a rolling boil (212°F or 100°C) will literally scorch your coffee.
- You're brewing for too long. If you're steeping grounds in a French press or pot, letting them sit for too long just keeps pulling out those bitter compounds.
- Your coffee grounds are too fine. A super-fine, powdery grind has a ton of surface area, which leads to a really fast and aggressive extraction.
Try this: let your boiling water sit for 30 to 60 seconds before you pour. If you're steeping, maybe knock a minute off your brew time. And if you’re in a real pinch, a tiny pinch of salt can work wonders to neutralize bitterness—it's an old-school trick that really works.
"How Should I Actually Store My Coffee Beans?"
Think of fresh coffee as having four mortal enemies: air, moisture, heat, and light. The moment you open that bag, these elements start a race to rob your beans of their amazing flavor and aroma.
Your best defense is simple: store your beans in an opaque, airtight container. Tuck it away in a cool, dark spot like your pantry.
A quick word of warning: Please, do not put your coffee in the refrigerator or freezer. The fridge is full of moisture and weird food smells that your coffee will absorb. The freezer’s extreme cold can shatter the flavorful oils within the bean's structure. Just don't do it.
Taking a second to store your coffee properly makes a huge difference in keeping it tasting fresh and vibrant.
"Can I Really Make Good Iced Coffee with Instant?"
You absolutely can. In fact, a quality instant coffee is one of the best ways to make iced coffee because it dissolves so easily in cold water, which saves you a ton of hassle.
The trick to a perfectly smooth, clump-free iced coffee is what I call the slurry method.
- First, put your instant coffee granules in the glass with just a tiny splash—maybe a tablespoon—of cold water.
- Stir it like you mean it until you have a smooth, syrupy paste with no dry bits left.
- Now, you can add the rest of your cold water or milk and ice. Give it another quick stir.
This extra step takes all of five seconds but guarantees your coffee dissolves completely. No more gritty sips. It’s a simple move that makes your iced coffee taste so much better.
"Does Water Quality Really Matter That Much?"
Yes, one hundred percent. Your finished cup of coffee is more than 98% water, so the stuff coming out of your tap has a massive impact on the final taste.
Tap water that’s heavy on chlorine can give your coffee a weird, almost medicinal or metallic flavor. On the flip side, really "hard" water (the kind with a lot of mineral content) can get in the way of proper flavor extraction, leaving you with a dull, flat-tasting brew.
Honestly, one of the single biggest upgrades you can make is to simply use filtered water. It gives you a clean, neutral base that lets all the complex, sweet, and bright notes of the coffee itself be the star of the show.
Ready to see how easy it is to make an incredible cup with a coffee that’s built for both convenience and amazing flavor? Give Cartograph Coffee a try. You'll be surprised at what premium instant coffee can do. Check out our collection at https://cartographcoffee.com.