The best way to make coffee while camping really comes down to your personal style of adventure. That said, I've found the AeroPress is tough to beat. It consistently pumps out an incredible, almost espresso-like coffee, and it’s a dream when it comes to weight and cleanup.
If you’re car camping with a crew, a classic French press or a good old Percolator is fantastic for brewing a bigger batch with minimal fuss. The right method for you will always be a trade-off between convenience, how much you're willing to carry, and how good you want that coffee to taste.
Brewing Your Best Coffee in the Backcountry
Let's be honest, most camp coffee is lukewarm, gritty, and just plain bad. We can do better. This guide is your new playbook for making a genuinely great cup of coffee out in the wild. We'll skip the generic advice and get right into what actually works, whether you're counting every single gram for a thru-hike or you've got the whole car packed for a weekend of comfort.
The simple truth about brewing outdoors is that you're always trying to balance three things:
- Weight and Packability: How much space can you spare in your pack? Is every ounce critical?
- Convenience and Cleanup: How much work are you willing to do before you've had your first sip?
- Flavor and Quality: Are you just looking for a caffeine kick, or are you chasing that perfect, cafe-quality cup?
There’s no single "best" method that works for everyone. An ultralight backpacker on a five-day trek has a completely different set of needs than a family setting up at a drive-in campsite. For some, instant coffee is the only logical choice. For others, packing a small hand grinder and a pour-over kit is non-negotiable.
The perfect cup of camp coffee isn’t just about the beans or the brewer; it’s about matching your method to the moment. It’s the warm mug in your hands as the sun rises, a small ritual that makes the wilderness feel even more special.
Finding Your Brewing Style
Think about your last trip. Were you up at dawn and rushing to hit the trail, or were you lounging by the fire with nowhere to be? Your answer will point you toward the right brewer. An AeroPress is brilliant for a quick, potent cup for one or two people. On the other hand, a big percolator bubbling away on the campfire grate has a rustic charm and serves the whole group.
Before we get into the nitty-gritty of each method, let's look at a quick overview.
Camping Coffee Methods at a Glance
Find your perfect match. This table summarizes the most popular camping coffee methods to help you quickly decide which brewing style fits your adventure.
| Method | Best For | Brew Time | Flavor Profile |
|---|---|---|---|
| AeroPress | Backpackers, solo campers, coffee snobs | 1-2 mins | Smooth, rich, low-acidity |
| Pour-Over | Car campers, flavor chasers | 3-4 mins | Clean, bright, nuanced |
| French Press | Car camping, groups | 4-5 mins | Bold, full-bodied, robust |
| Percolator | Large groups, campfire cooking | 5-10 mins | Strong, classic, "cowboy coffee" |
| Instant Coffee | Ultralight backpackers, convenience seekers | <1 min | Varies widely, from poor to surprisingly good |
This table should give you a good starting point. Now, we’ll explore the specific methods that deliver the best results for your style of adventure. Even if your setup is simple, a few small tricks can make a huge difference in your final cup, especially when you're figuring out how to make coffee without electricity and have to rely on a camp stove or an open fire.
Get ready to upgrade your morning campfire ritual from a chore into a highlight of your trip.
Finding Your Ideal Camping Coffee Method
Let's be honest, there's no single "best" way to make coffee when you're camping. The right method is the one that fits your adventure. A family on a weekend car camping trip has totally different needs than a solo backpacker who counts every single gram in their pack.
The whole decision really comes down to balancing weight, how much cleanup you're willing to do, and the quality of that final, glorious cup of coffee.
It usually starts with one simple question: are you backpacking or car camping? Just answering that will cut your options in half and point you toward your perfect morning ritual. This decision tree is a great starting point.
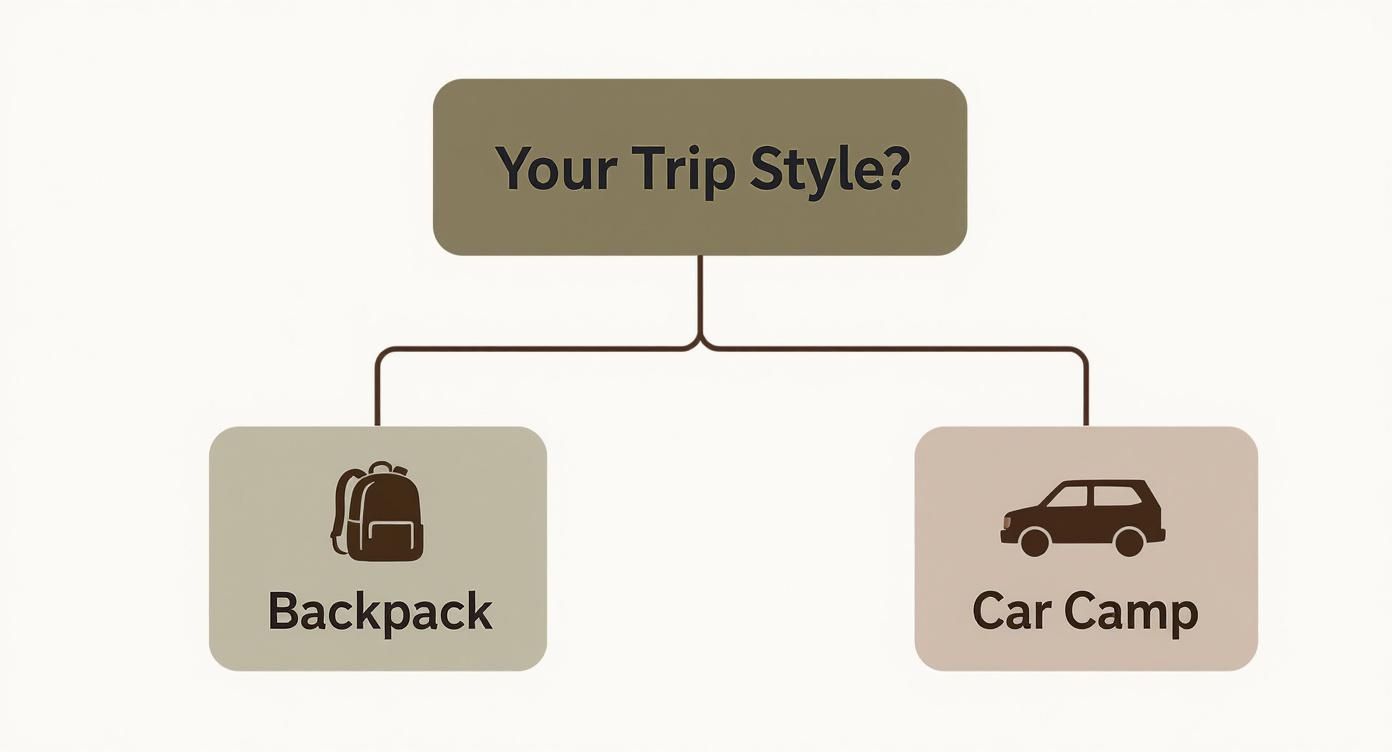
As you can see, backpackers naturally lean toward anything light and compact. Car campers, on the other hand, can afford the luxury of bigger brewers that feel a bit more like home. Let's dig into what that actually looks like out in the wild.
The Car Camping Classics
When you've got a vehicle, you have space. That means you can bring gear to brew for a whole group and enjoy a more relaxed, full-flavored coffee experience without stressing about the bulk.
- French Press: This is my go-to for a rich, full-bodied brew that can serve a few people at once. The camping versions are usually made from tough stainless steel, so you don’t have to baby a fragile glass carafe. The only real downside is cleanup—you’ll need a decent amount of water to rinse out all the grounds.
- Percolator: Nothing says "cowboy coffee" quite like a percolator bubbling away on a camp stove or over a fire grate. It's awesome for big groups and makes a pot of seriously strong, hot coffee. Just be careful, because it's really easy to over-extract the grounds, which can turn the coffee bitter if you're not paying attention.
The rise of specialty coffee culture has changed the game for outdoor brewing. Gone are the days of settling for gritty, boiled coffee as your only option. Today’s gear is designed for taste and portability.
Lightweight and Trail-Ready
For backpackers, thru-hikers, or anyone obsessed with a light pack, it’s all about efficiency. You want a fantastic cup of coffee with the least amount of weight and fuss possible.
The AeroPress has earned its cult-favorite status for good reason. It weighs only about 200 grams and brews an incredibly smooth, potent cup in under two minutes. Plus, the cleanup is ridiculously easy. It’s no surprise that user surveys on sites like backpackinglight.com show over 60% of backpackers prefer immersion brewers like the AeroPress or simple pour-over kits—they just nail that balance between flavor and trail-ready convenience.
Of course, if you're looking for ultimate simplicity, you can't beat today's craft instant coffee. I know, it used to have a terrible reputation, but the new stuff can be genuinely delicious and complex. For anyone who puts speed and zero cleanup above all else, checking out the best instant coffee for camping is a game-changer.
Ultimately, by thinking through your trip's needs—how many people you're brewing for, how much weight you can carry, and how much effort you want to put in—you'll find the perfect brewer that makes your morning coffee a highlight of the adventure, not a chore.
Putting Together Your Perfect Outdoor Coffee Kit
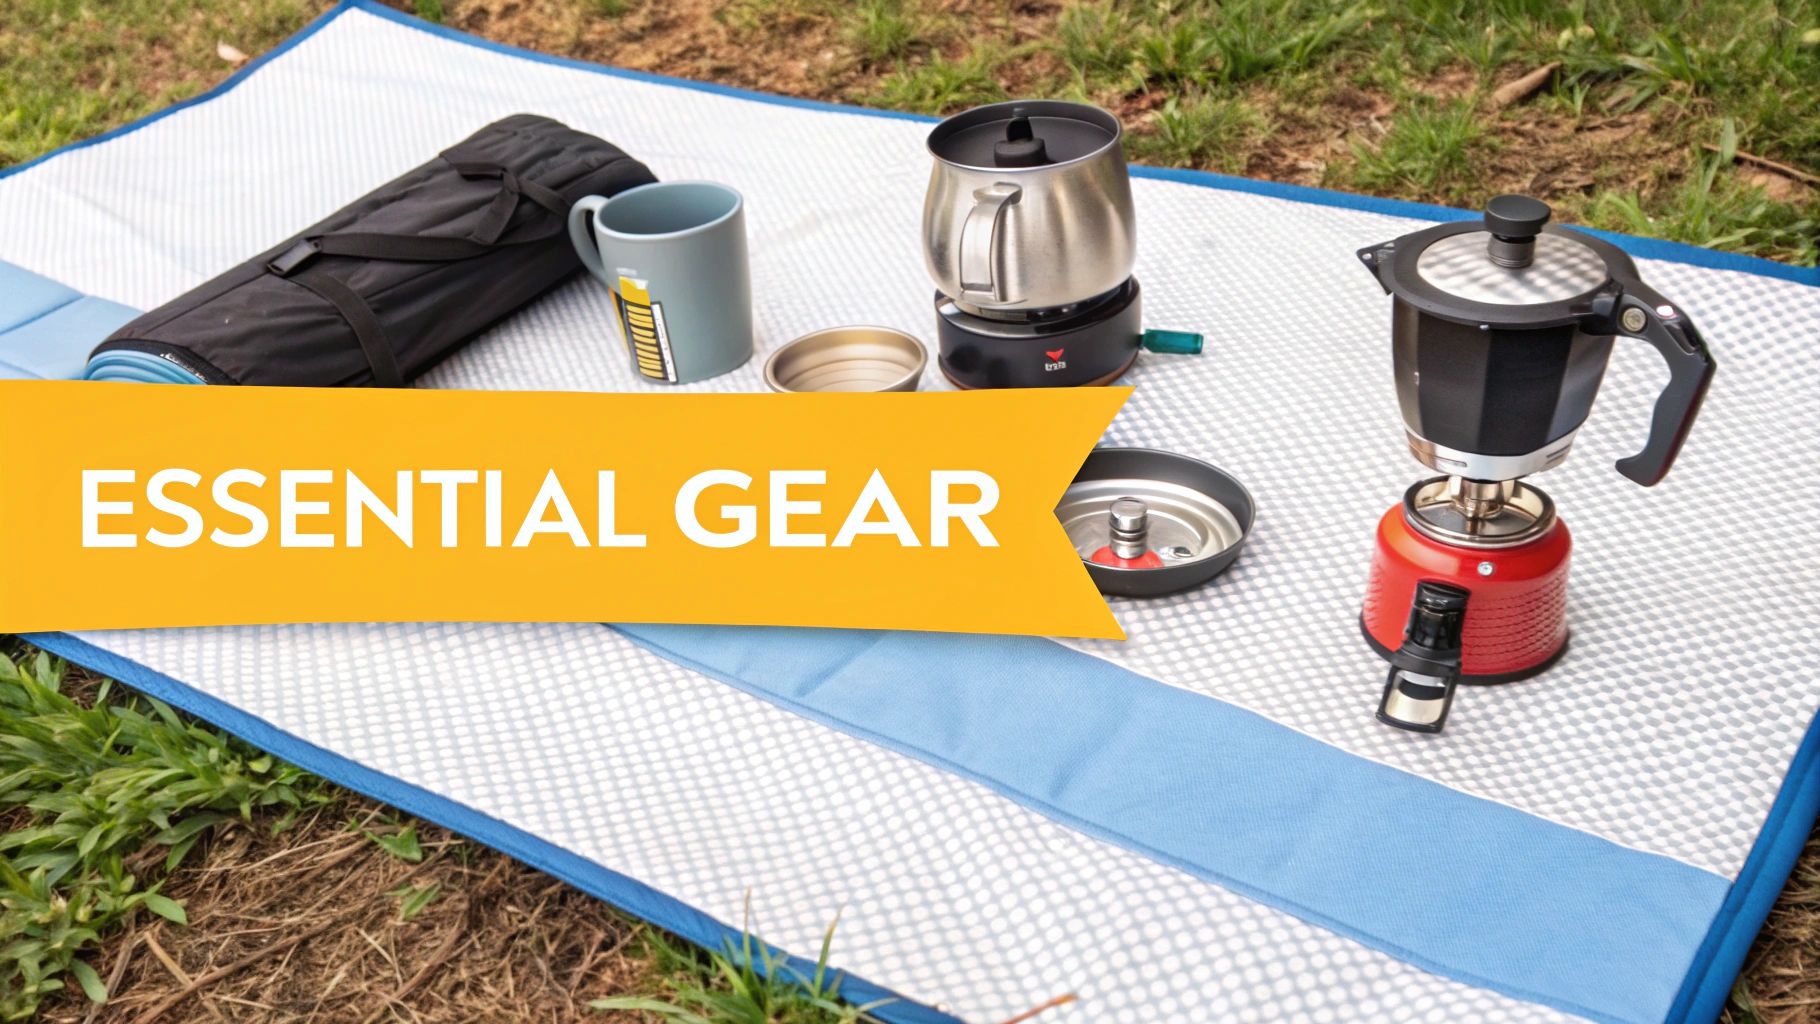
Choosing the right brewer is a great start, but it’s only one piece of the puzzle. The real magic in making incredible camp coffee comes from the supporting cast of gear you bring along. Every item, from your stove to your mug, has a part to play in that first perfect sip of the day.
A reliable way to boil water is absolutely essential. While the idea of brewing over a crackling campfire is romantic, it’s a terrible way to control temperature and an easy way to scorch your coffee. For consistency and a better-tasting cup, a canister stove is your best friend.
A modern backpacking stove can get your water to a rolling boil in less than four minutes. That kind of speed and precision is something a campfire just can't offer, and it’s a game-changer on chilly mornings when you want that coffee now.
The Great Debate: Grind Fresh or Go Fast?
So, should you grind your beans at the campsite? For anyone serious about flavor, the answer is a hard yes. The aroma and taste you get from freshly ground coffee are on another level. Pre-ground coffee starts going stale almost immediately, losing its vibrant character long before it ever makes it into your pack.
Sure, packing a small manual hand grinder adds a little weight and an extra step to your morning ritual. But the flavor payoff is huge. It also lets you dial in the perfect grind size for your brewer—coarse for a French press, finer for an AeroPress—which is critical for getting the extraction just right.
If you’re a backpacker counting every gram, check out our guide on the best coffee for backpacking where we break down the pros and cons of whole beans versus other trail-friendly options.
Your insulated mug isn't just a container; it's a critical piece of gear that extends the enjoyment of your hard-earned brew. It keeps your coffee hot against the crisp morning air, giving you time to savor the moment.
The Supporting Roles: Water and a Good Mug
This might seem obvious, but proper water management is key. Always pack more water than you think you’ll need for brewing, keeping in mind you'll use it for cleanup, too. A good rule of thumb is to carry at least one liter per person just for morning coffee and breakfast.
Finally, never underestimate the power of a good insulated mug. Those classic enamel camp mugs look cool, but they lose heat in a heartbeat. A double-walled, vacuum-insulated mug, on the other hand, will keep your coffee steaming hot for an hour or more. It’s a small luxury that lets you sip slowly while watching the sunrise instead of gulping it down before it gets cold.
Before you head out, run through this checklist to make sure you have everything you need:
- Your Brewer: AeroPress, French press, pour-over, etc.
- Heat Source: A canister stove and plenty of fuel.
- Pot or Kettle: Something to boil your water in.
- Coffee: Whole beans or pre-ground, stored in an airtight container.
- Grinder (Optional): A manual hand grinder for the freshest taste.
- Insulated Mug: One for every coffee lover in your group.
- Water: Enough for brewing, rinsing, and then some.
- Cleaning: A small sponge or cloth.
- Waste Bag: For packing out your used grounds (leave no trace!).
With this kit, you're not just making coffee in the woods—you're set up for a genuinely great brew, every single time.
Mastering Your Outdoor Brewing Technique
It’s one thing to dial in your perfect brew in the comfort of your own kitchen, but recreating that magic with limited gear in the wild? That’s a completely different art form. Honestly, the best way to make coffee while camping isn't just about the brewer you pick; it's about learning to adapt your technique to whatever nature throws at you. A few small tweaks can be the difference between a mediocre cup and a truly great one.
Let's start with one of the biggest wildcards: water temperature. Most of us aren't packing a kettle with a built-in thermometer for a backpacking trip. Still, getting the water temperature right is critical for a balanced extraction. The sweet spot is generally between 195°F and 205°F—just below a full boil.
Here’s a simple, field-tested trick I always use: bring your water to a hard, rolling boil, then take it off the heat and let it sit for about 30 to 45 seconds before you start pouring. That brief pause is just enough to let the temperature drop out of the "scorching" zone, preventing that bitter, burnt taste you get from using water that's too hot.
Nailing the Golden Ratio
Once your water is ready, you need to think about your coffee-to-water ratio. You can definitely eyeball it, but if you want consistently good coffee day after day on your trip, a little precision pays off. A fantastic starting point for almost any brew method is the 1:16 ratio. That's just a simple way of saying one part coffee to sixteen parts water.
So, what does that look like for a standard 12-ounce camp mug?
- 2 level tablespoons (roughly 14 grams) of coffee grounds
- 10-12 ounces (about 300-350 ml) of water
If you didn’t pack a scale, those two tablespoons are a pretty reliable measurement. This ratio gives you a full-bodied, flavorful cup that isn’t weak or sludgy. Of course, you can always adjust it to your personal preference, but this gives you a solid, repeatable baseline to work from.
Mastering your camp coffee technique is really about creating a small, repeatable ritual. It’s the process of turning simple ingredients and basic tools into a moment of pure comfort in the middle of nowhere.
Adapting to the Elements
Brewing outdoors means dealing with challenges you don’t have at home, like cold weather and high altitudes. For instance, cold morning air can suck the heat right out of your brewer and your mug in no time. The best way to fight this is to preheat everything. Just pour a splash of hot water into your French press or mug, swirl it around for a few seconds to warm it up, and then dump it out before you add your coffee. This one tiny step makes a huge difference in keeping your coffee hot.
Altitude is another sneaky factor. Water boils at a lower temperature the higher you go—it can be as low as 190°F at 8,000 feet. This can easily lead to under-extracted, sour-tasting coffee. To get around this, you have a couple of options: let your coffee steep for a bit longer, or use a slightly finer grind than you normally would. These little adjustments help ensure you're pulling all those rich, delicious flavors from the beans, no matter how high up the mountain you are.
Choosing the Right Coffee for Your Adventure
Your fancy new camp brewer gets all the glory, but let’s be honest: the coffee itself is the real star of the show. Picking the right beans—and how you pack them—is what really elevates that morning ritual from a caffeine fix to a memorable moment.
When it comes to camp coffee, you're always balancing two things: peak freshness against pure convenience. There's no single right answer, just the one that’s right for your trip.
Fresh Beans Versus Ultimate Convenience
For the absolute best flavor, nothing beats grinding your beans just moments before you brew. Whole beans hold onto their volatile oils and complex aromas way longer than pre-ground coffee. Sure, packing a tough little hand grinder means one more piece of gear, but the payoff is huge. That fresh-ground smell mingling with the pine-scented morning air? That's what it's all about.
Grinding on-site also lets you dial in the perfect size for your brewer—chunky and coarse for a French press, or finer for an AeroPress. This control is the key to getting a balanced, delicious cup instead of something weak or bitter.
Still, sometimes convenience just has to win. If you're tight on space or just want to keep things simple, pre-ground coffee is your friend. The trick is to buy it as close to your trip as possible and immediately stash it in a truly airtight container. You want to trap every last bit of freshness you can.
We're not the only ones who think good coffee is essential outdoors. The global market for camping coffee makers hit around $250 million in 2023. It’s clear we all refuse to settle for a bad cup, even when we're miles from the nearest cafe. You can dig into the trends in camping coffee makers to see for yourself.
The Rise of Actually-Good Instant Coffee
And if pre-ground still isn't fast enough for you? It's time to check out the new wave of specialty instant coffee. Seriously, forget the bitter, dusty stuff you remember. Modern craft brands are producing instant coffees that are genuinely delicious, with surprisingly rich and complex flavors. For ultralight backpackers counting every gram, or for those mornings when you just need caffeine now, these are an absolute game-changer.
Matching Roasts to Your Brewing Method
Finally, let's talk pairings. The type of roast you choose can make a big difference depending on how you're brewing it. Think of it like pairing wine with food.
Here’s a quick rundown to get you started:
- Light Roasts: These are the bright, acidic, and often fruity beans. They really sing in a Pour-Over or AeroPress, where their delicate, nuanced flavors can be properly appreciated.
- Medium Roasts: The reliable, all-around champion. They've got that perfect balance of flavor and body, making them a great fit for just about any method, from a French Press to a simple drip setup.
- Dark Roasts: Big, bold, and roasty. These beans have a heavy body and low acidity, making them perfect for brewers that produce a rich, intense cup. They're fantastic in a Percolator or Moka Pot, giving you that classic, strong "cowboy coffee" kick.
Putting a little thought into your coffee choice beforehand guarantees that the first thing you taste in the morning is something worth waking up for.
Leave No Trace Coffee Cleanup
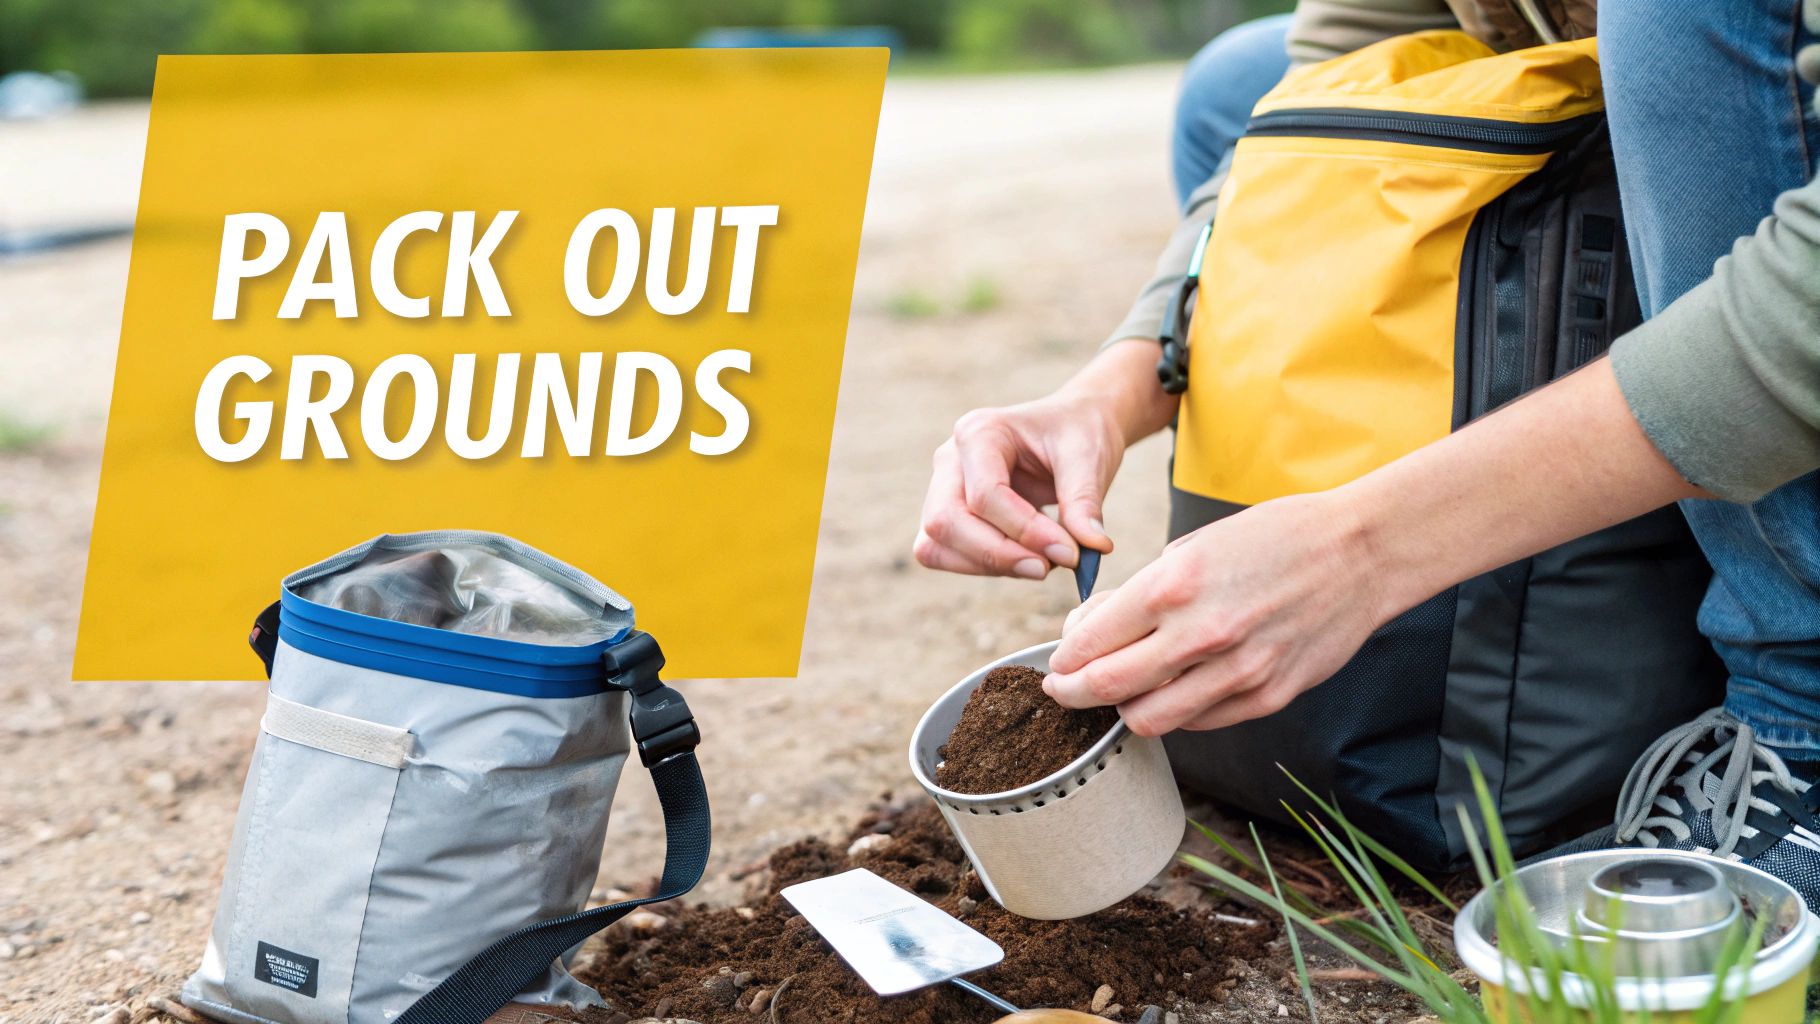
That perfect cup of coffee in the wild comes with a little bit of responsibility. The last, and maybe most important, part of your morning ritual is cleaning up without leaving a mess behind. It’s all about making sure your coffee habit respects the beautiful places you’re there to enjoy.
The golden rule is simple: pack it in, pack it out. This goes for everything, but it’s especially true for used coffee grounds. It might seem harmless to just scatter them, but doing so can actually mess with the local ecosystem. Coffee is acidic, which can throw off the soil chemistry, and the smell can attract animals, making them used to human presence.
The real standard for outdoor ethics is to leave your campsite better than you found it. Packing out your coffee grounds is a small, easy step that has a huge collective impact on preserving these wild spaces for everyone.
What to Do With Used Coffee Grounds
The best way to deal with your grounds is to let them cool down completely. Once they’re cool, just dump them into a dedicated trash bag or a small, reusable container. I personally carry a small screw-top plastic jar just for this purpose; it keeps the wet grounds contained and prevents that coffee smell from attracting critters to my pack.
This is a non-negotiable step for any brewer that leaves behind a lot of loose grounds. Take the classic stovetop percolator, for instance. It's been a go-to for generations of campers because it can make big batches for a group, but it also creates a ton of wet grounds you have to pack out. You can read more about these classic camping coffee techniques on freshoffthegrid.com to see what I mean.
Cleaning Your Gear the Low-Impact Way
Getting your gear clean with as little water as possible is another key skill. For something like a French press or percolator, I’ve got a pretty simple, water-saving trick.
- First, use a small spatula or spoon to scrape out as many of the grounds as you can into your waste container.
- Next, pour just a little water into the brewer—an inch or two is more than enough.
- Give it a good, vigorous swirl to get all the leftover grounds loose.
- Now, strain that "coffee water" through a fine mesh strainer (or even a bandana) into your mug. This will catch the last of the solids.
- Pack out those captured grounds. You can either drink the leftover gray water or disperse it far away from any streams or lakes.
This little routine gets your gear clean enough for the next brew without wasting your precious drinking water or polluting the environment. It's a small habit, but it makes a huge difference.
Got Questions About Camping Coffee? We’ve Got Answers
Once you’ve brewed a few pots of coffee out in the wild, you start running into the same little questions. How do I make this simpler? What do I do with the messy grounds? Can I just stick my pot in the fire?
Let's clear up some of the most common things people ask.
What’s the Absolute Easiest Way to Make It?
Honestly, it’s instant coffee. And I don't mean the bitter stuff from a dusty jar in your grandma's cupboard.
The specialty instant coffee scene has exploded. You can find single-serving packets from top-tier roasters that taste amazing with just a little hot water. For ultralight backpackers or anyone who just doesn’t want to fuss with gear, it’s a game-changer. No cleanup, no extra weight—just good coffee.
How Do You Deal With Used Coffee Grounds?
The golden rule here is simple: pack it in, pack it out. This is a core part of the Leave No Trace principles.
Let your used grounds cool down completely. Then, scrape them into a zip-top bag or a small, dedicated reusable container to carry out with the rest of your trash.
A lot of campers think it's fine to just scatter coffee grounds around their site. This is a huge mistake. The acidity can mess with the local soil, and the scent is a dinner bell for curious critters, from squirrels to bears.
Can You Actually Brew Coffee Over a Campfire?
You bet, but you have to be smart about it. A campfire's heat is intense and uneven, so you need the right gear and a little patience.
A tough-as-nails percolator or a stainless steel French press can handle the heat. The trick is to avoid putting it directly into the flames, which will scorch your coffee and potentially damage your gear. Instead, set it on a sturdy grill grate over a bed of hot coals for a much gentler, more controllable heat.