You're standing over a glass carafe that looks promising until the first sip. The coffee is flat, a little burnt, and nowhere near as comforting as the smell suggested. Before you blame the beans or replace the machine, stop and treat the brew like a repeatable process. Ratio, grind, water, and time each move the flavor in a different direction, and one small adjustment usually does more than a cupboard full of gadgets.
This is the useful part of learning how to use a drip coffee maker. You don't need to chase every setting at once. Identify the symptom, change one dial, taste the next pot, and keep the version that works in your kitchen.
Why Your Morning Pot Tastes Off
The modern automatic drip brewer became a mass-market household appliance in the United States after Mr. Coffee first sold one in 1972. Its popularity reflected a simple advantage, automation made paper filtration, heated water delivery, and controlled extraction easy enough for daily use. The method itself reaches back to Melitta Bentz's commercial paper filter invention in 1908 and the Wigomat electric drip brewer patent in 1954, as described in the history of drip coffee and automatic brewing.
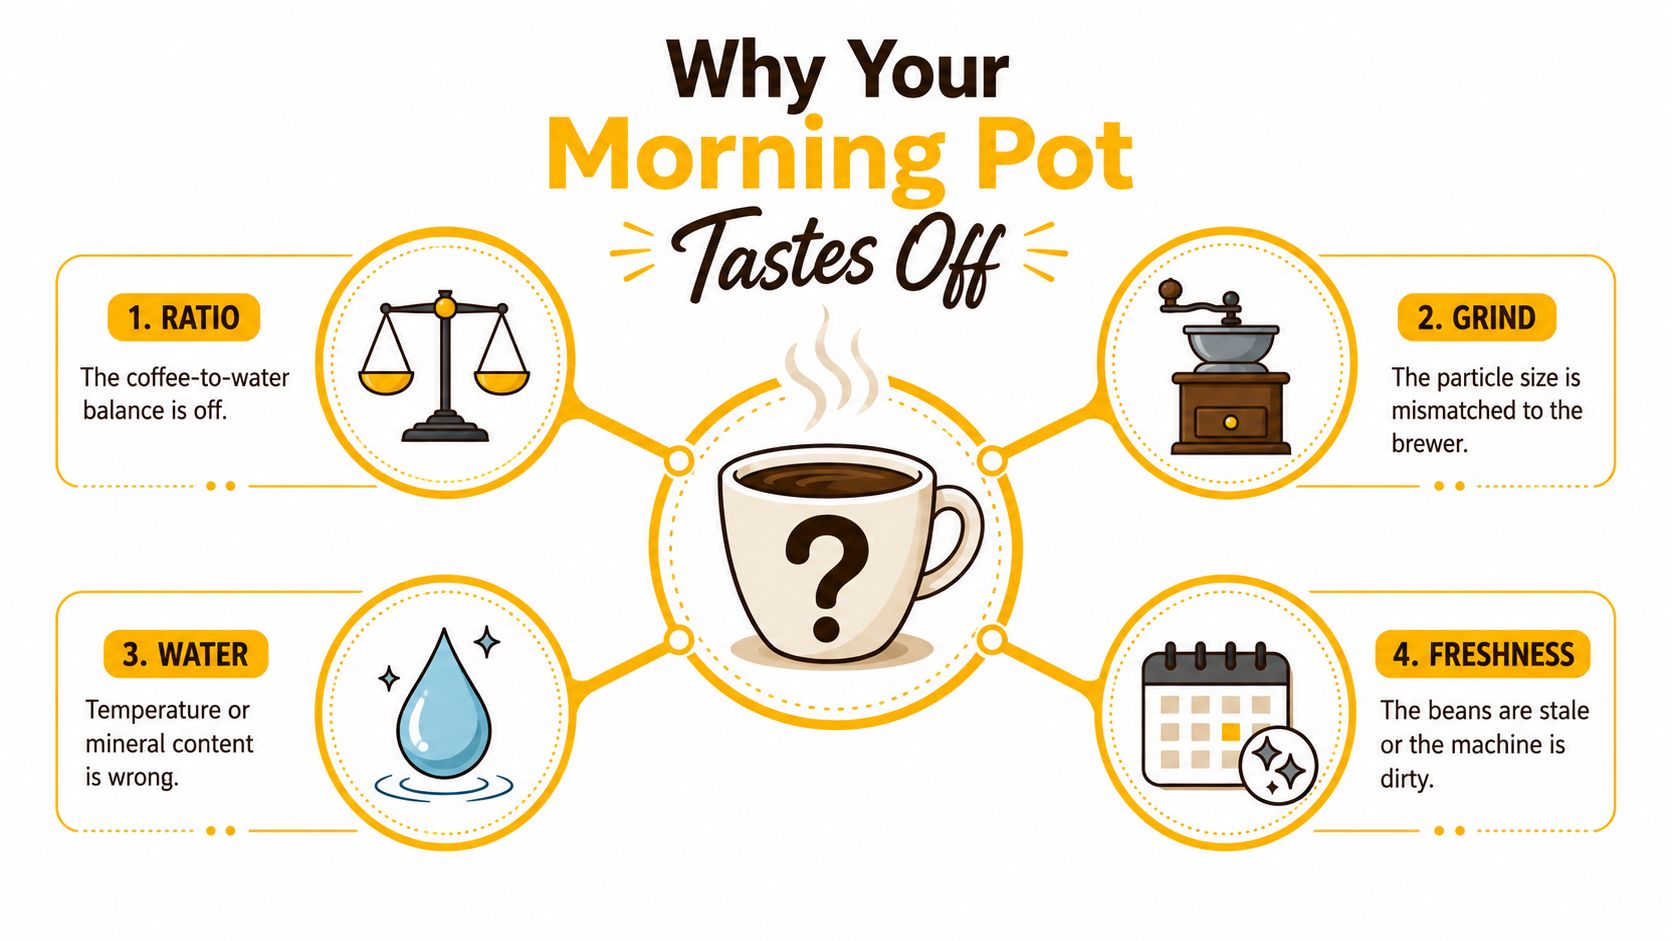
On a Saturday morning, I'd start with the complaint rather than the machine. A sour cup usually points toward under-extraction, so the grounds haven't given the water enough soluble material. A bitter cup often means the water has pulled too much from the bed. A weak cup can contain too little coffee for the water volume, while a muddy cup may come from an overly fine grind, uneven flow, or a metal filter that lets more sediment through.
Match the flaw to one adjustment
- Sour: Move the grind slightly finer first. Finer particles give water more surface area and can increase extraction.
- Bitter: Move the grind slightly coarser before changing anything else. This shortens the extraction path through the bed.
- Weak: Increase the coffee dose while keeping the water amount steady. Changing both dose and water makes the result harder to read.
- Muddy: Try a paper filter or a coarser grind. Paper removes more oils and fine particles, while coarsening can reduce clogging.
Water can complicate the diagnosis. Chlorine, excess minerals, or an inconsistent supply can make a correctly measured recipe taste dull or metallic, so guidance on choosing water filters for better-tasting coffee can help if your tap water is the recurring suspect.
Practical rule: Change one variable, brew again, and write down what happened. A coffee problem becomes manageable as soon as you stop adjusting everything at once.
Setting Up Your Brewer the Right Way
A reliable pot starts before you press the button. Put the brewer on a stable, level surface, clear enough that the carafe sits squarely beneath the basket, and use a scale if you have one. If your kitchen is crowded, small layout changes can help you maximize counter space in small kitchens, especially when the brewer needs to stay accessible rather than being stored after every use.
Choose the filter and grind
A paper filter is the easiest starting point. It produces a cleaner cup by holding back oils and fine sediment, but some paper can contribute a papery taste if you skip rinsing. A metal filter gives more body and preserves more oils, yet it can leave a heavier, less polished texture. Neither is universally right. Choose paper when clarity matters, and metal when you prefer richness and want a reusable option.
Use a medium grind, roughly 500 to 700 microns, which should resemble coarse sand according to the provided brewing guidance at Coffee Gear HQ. If the grounds look powdery, the basket may drain slowly and the cup can turn harsh. If they look closer to cracked pepper, the water may pass too quickly.
Measure water and coffee
A useful full-carafe starting point is about 60 grams of coffee for 1 liter of water, with the broader recommended range sitting around 1:16 to 1:18 by weight in the same drip coffee ratio guide. A typical 12-cup machine may use about 60 to 90 grams across its batch range, depending on the actual water volume and the strength you prefer. Don't trust the machine's “cup” label blindly. Measure the water in the reservoir or, better, weigh it.
Rinse a paper filter with hot water, then discard that water. This removes much of the paper taste and warms the basket. Fill the reservoir to the line you intend to brew, not beyond it, and make sure the lid is closed so the brewer can distribute water correctly.
Before a first use, run a plain-water cycle to clear manufacturing dust or a plastic smell. The same habit is useful after a long period of storage. Keep the carafe clean, and don't leave yesterday's coffee in it while making today's pot.
The no-thinking pre-brew check
- Filter: Paper rinsed and seated, or metal filter washed and clear.
- Grind: Medium, with no obvious flour-like powder.
- Dose: Weighed coffee matched to the water volume.
- Reservoir: Filled to the intended batch line.
- Carafe: Empty, clean, and correctly positioned.
- Machine: Lid closed, basket aligned, and warmer ready.
The Brewing Sequence From Bean to Cup
The machine can automate water delivery, but it can't rescue a careless setup. Weigh the coffee first, then grind it immediately before brewing if possible. Put the filter into the basket, add the grounds, and gently level the bed with a small shake. Don't tamp it down. A compressed bed can restrict flow and encourage water to find a narrow path.
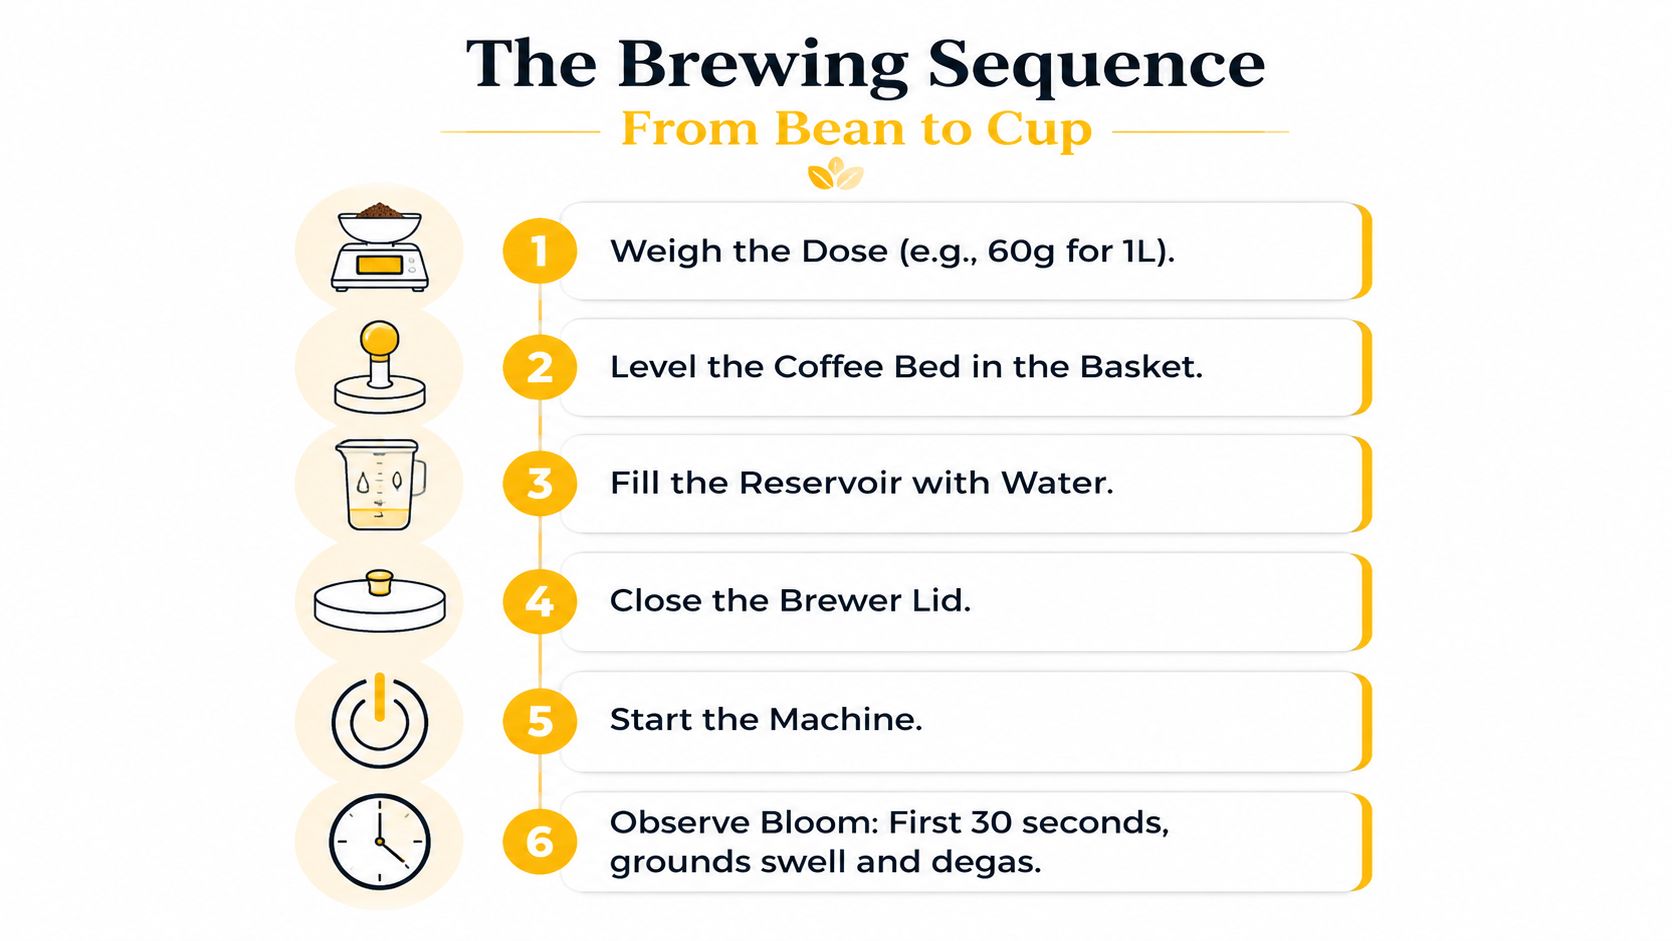
Fill the reservoir with the measured water, check that the carafe is seated, close the lid, and start the machine. The first part of the cycle matters because the grounds need to become evenly wet before the main extraction develops. During the bloom, often visible in the first 30 seconds, the bed swells as trapped gas escapes. That early saturation is more useful to watch than the brew-time promise printed on a box.
Read the coffee bed
A healthy bed should wet evenly, without large dry islands around the edges. You may see a gentle dome as the grounds swell. If water cuts a trench through one side or leaves a dry patch elsewhere, the spray pattern, filter position, or grind distribution may be uneven. That channeling lets water take the easiest route, so part of the coffee is overworked while another part contributes very little.
The full contact-time target for automatic drip commonly falls around 4 to 8 minutes, while a standard home batch often works well near 4 to 6 minutes, as outlined in drip extraction guidance. Treat that as a diagnostic window, not a race. A larger batch and a different basket design can change the total cycle.
For a visual demonstration of the sequence, this brewing walkthrough can make the order of operations easier to follow:
Finish the pot carefully
When the final drips slow to an occasional drop, lift the carafe from the warming plate within about two minutes. Swirl it gently to blend the coffee from the first and last part of the brew. Serve once the coffee has cooled into roughly the 140 to 155°F range, which balances aroma with a comfortable sipping temperature.
If you want to build deeper technical skill beyond a home routine, compare the available 2026 barista course options. For most households, though, the best improvement is simpler. Brew into a thermal carafe when you can, or pour the fresh coffee into a preheated serving vessel instead of allowing a hot plate to keep cooking it.
For the ratio math behind the recipe, use Cartograph Coffee's guide to the coffee golden ratio.
The Four Dials That Change Flavor
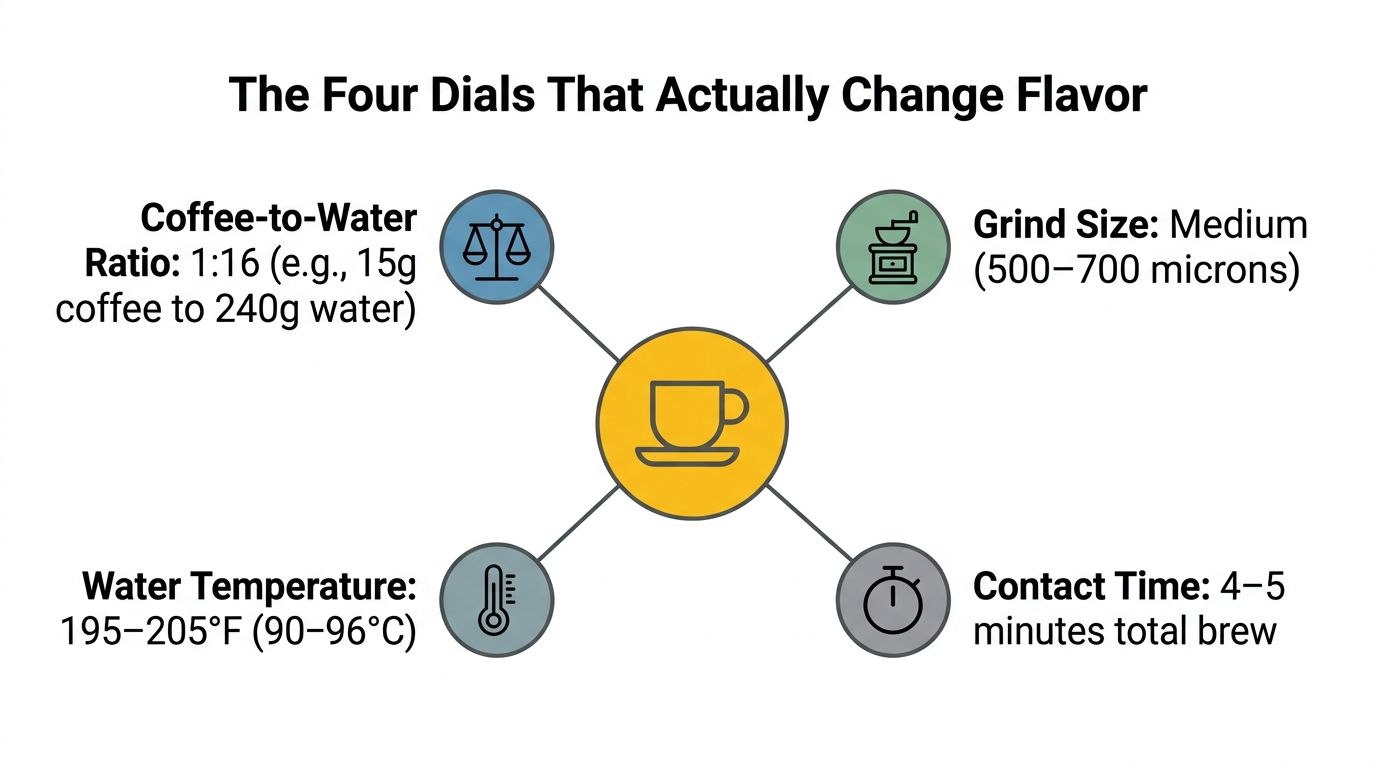
A sour, bitter, weak, or muddy pot usually points to one dial before the others. Ratio sets concentration, grind size controls how readily water extracts the grounds, temperature supplies the heat for dissolving compounds, and contact time determines how long extraction continues. Adjust one variable per brew so the result stays readable.
Set ratio first. A sound starting range is 1:16 to 1:18 by weight. The Specialty Coffee Association benchmark is commonly expressed as 55 grams of coffee per liter of water, or about 1:18.2, according to this home drip ratio reference. At home, that works out to roughly 10 to 12 grams per 6 fluid ounces. Start near the middle. If the flavor is clean but weak, add coffee rather than cutting water at random.
Use the cup as your troubleshooting map:
- Weak but clean: raise the dose. Ratio is the first adjustment.
- Sour or sharp: move to a slightly finer grind. Water is passing through too quickly or extracting too little.
- Harsh or bitter: try a slightly coarser grind. A clogged basket or overly long brew can also pull unwanted bitterness.
- Muddy: inspect contact time and the basket. A slow drawdown often signals fines or a grind that is too fine.
Temperature acts as a guardrail, not a cure-all. Drip water generally sits around 90 to 96°C, or 194 to 205°F, with SCA-aligned guidance often stated as 200°F ± 5°F, as explained in this coffee water temperature guide. If the brewer runs cool, coffee can taste thin and sour. Correct that baseline before chasing smaller changes.
Contact time confirms the diagnosis. A fast cycle supports an under-extracted, weak cup. A slow, restricted basket can create bitterness and muddy flavor. The extraction range associated with the SCA benchmark is 18 to 22%, with brewed strength around 1.15 to 1.35% total dissolved solids, as summarized in automatic drip extraction research. A refractometer is unnecessary for practical adjustments. Taste, change one dial, and brew again.
Keep a short log with the date, coffee, water weight, coffee weight, grind setting, and tasting note. “Sour, quick drawdown, finer next time” gives you a useful instruction for the next pot.
What Drip Coffee Guides Get Wrong About Temperature
Your brewer can hit a sensible temperature and still make sour, bitter, weak coffee. Temperature sets the conditions for extraction, but grind, dose, and contact time decide how much the water removes. A controlled study discussed by the Specialty Coffee Association found little measurable sensory change when brew strength and extraction yield stayed constant while water temperature moved from 87°C to 93°C. That result puts temperature advice in proportion, as explained in the SCA discussion of brew temperature and sensory profile.
Use the brewing window as a floor rather than a target to chase obsessively. Drip water commonly falls between 90 and 96°C, or 194 and 205°F. Some consumer machines run around 185 to 190°F, leaving the cup thin or sour even when the recipe looks reasonable, as noted in the water-temperature effect guide. If your brewer runs cool, address that first. A precise reading will not rescue a coarse grind, a low dose, or a restricted basket.
A quick check can separate a heat problem from an extraction problem:
- Measure at the spray head: Put a suitable kitchen thermometer near the water outlet during brewing without blocking the machine.
- Compare the reading: Check the brewing water, not merely the reservoir, against the recommended window.
- Hold the recipe steady: Keep the ratio and grind unchanged for the next test so temperature remains the only adjustment.
- Taste for the next dial: Sour coffee points toward finer grinding or a longer contact time. Bitter coffee usually needs less extraction, while weak coffee may need more coffee or a finer grind.
Preheating the brewer and carafe limits heat loss, and a thermal carafe keeps finished coffee away from a hot plate that can flatten its flavor. Neither fix corrects poor water delivery. The practical guidance in the correct temperature for coffee is useful when setting a baseline, then let the cup tell you which dial to turn next.
Cleaning Routines and Quick Fixes
A clean brewer protects flavor before any recipe adjustment does. Coffee oils cling to the basket and carafe, mineral scale narrows the water path, and a dirty spray head can wet the grounds unevenly. Keep the routine short enough to repeat, so residue never becomes the dominant note in the cup.
Empty the grounds after every brew. Rinse the basket and carafe, then wipe the warming plate after it cools. Once a week, wash the basket, carafe, lid, and reusable filter with warm soapy water, and let each part dry completely before putting the brewer back together.
Scale needs a separate schedule. Run a monthly descaling cycle with commercial descaler or a 1:1 white vinegar-to-water mixture, then flush the machine with two full water-only cycles. Follow the manufacturer's instructions and the maintenance steps in this guide to clean a coffee maker. Replace a spent charcoal filter; many households use a two-month interval, while hard water can call for more frequent descaling.
Hard water leaves recognizable clues: slower flow, an uneven spray, or a metallic edge in the coffee. Commercial descaler usually leaves less aroma behind than vinegar, but vinegar works as an available alternative when the brewer's instructions allow it.
Use the symptom to choose the fix rather than changing the recipe at random:
| Problem | Likely Cause | Fastest Fix |
|---|---|---|
| Bitter or metallic taste | Mineral scale or old coffee oils | Descale, wash the carafe, and clean the basket |
| Slow drip or overflowing basket | Clogged spray head or grind too fine | Clear the spray head and move the grind coarser |
| Weak pot | Under-dosing or a failing heating element | Weigh more coffee, then test the brewer's heat |
| Cloudy oil film | Dirty reusable filter | Wash the filter thoroughly or switch to paper |
A clogged spray head can mimic a grind problem, while a failing heating element can make an otherwise sound recipe taste weak. Clear and clean the machine before moving several flavor dials at once.
Do not store a wet reusable filter with grounds stuck to it. Fine mesh holds an oily film that rinsing may miss, and that stale residue can return in the next pot.
Busy Mornings, Backups, and Better Coffee Habits
A drip machine is excellent when you have a few minutes, a clean basket, and enough coffee to justify a batch. It isn't ideal when you're already late, sleeping outdoors, or trying to make one drink without waking everyone in the house. A good backup should preserve the part of the routine you care about while admitting that convenience changes the ceiling.
| Option | Prep time | Flavor ceiling | Portability |
|---|---|---|---|
| Fresh drip pot | Several minutes of setup and brewing | Highest when ratio, grind, and heat are controlled | Low |
| Flash brew | Requires brewing hot coffee over ice | Bright and immediate, but depends on dilution | Moderate |
| Cold brew concentrate | Prepared ahead of time | Smooth and concentrated, with a different profile from hot drip | Moderate |
| Freeze-dried instant | Very short preparation with hot water | Convenient and capable of clean flavor, though less layered than fresh grinding | High |
Use flash brew when you want a chilled drink now and can still operate a brewer. Use cold brew concentrate when preparation happened earlier and you want a cold serving with minimal morning work. Choose freeze-dried instant for travel, commuting, camping, or the moment a full drip cycle just won't fit. Instant coffee isn't failed drip coffee. It's already brewed coffee that has been dried, then rehydrated when you add water.
Build habits that remove decisions
Grinding the night before saves time, although an airtight container matters because ground coffee loses aroma faster than whole beans. Pre-measuring filter doses into a small jar means the morning recipe starts with one known quantity. Keeping a kettle of hot water ready can rescue a rushed cup, whether you're making instant coffee or preheating a carafe before the machine runs.
A compact checklist keeps the standard brew intact:
- Water: Measure the intended volume.
- Coffee: Weigh the dose rather than relying on a scoop.
- Grind: Start at medium and adjust from the taste.
- Filter: Choose paper for clarity or metal for more body.
- Brew: Watch for even wetting and note the cycle time.
- Serve: Swirl the carafe and pour soon after brewing.
- Backup: Use instant coffee when portability or speed matters more than batch brewing.
Cartograph Coffee makes organic instant coffee for situations where a drip brewer isn't practical, including work, travel, home, and outdoor use. Visit Cartograph Coffee to explore an instant option for your backup routine, then use the same care with your water temperature and serving vessel that you bring to a fresh pot.