A U.S. measuring cup is 8 fluid ounces (about 237 mL), while a classic coffee serving is 6 fluid ounces. Use the vessel chart below to choose the kind of cup you mean before measuring your coffee.
The familiar advice that a cup is a cup doesn't work at the coffee station. A recipe, a nutrition label, a brewer's carafe, and the mug in your hand can all use the same word for different amounts. The useful answer to how many ounces of coffee in a cup starts with naming the vessel, not counting scoops.
Ounces in Every Kind of Coffee Cup
The main split is between the household measuring cup and the smaller classic coffee serving. Neither tells you how much your favorite mug holds, so match your instructions to the appropriate row before you pour.
Fluid ounces in common coffee cups
| Vessel | Fluid ounces | Milliliters | What the number means |
|---|---|---|---|
| U.S. measuring cup | 8 | About 237 | Household volume for water or finished drink |
| Nutrition-label cup | 8 | 240 | Labeling cup, with a fluid ounce treated as 30 mL |
| Classic coffee serving | 6 | About 177 | Traditional serving used in coffee directions |
| Coffee-maker cup | About 5.5 | About 163 | Short cup marking on some brewers, not a universal standard |
| Everyday mug | 10 to 12 | About 296 to 355 | Useful working sizes for a desk or home mug |
| Flavored coffee reference | 12 | 360 | FDA reference amount for prepared flavored or sweetened coffee |
| Travel tumbler example | 16 | About 473 | A chosen commute or camp-cup size, not a universal capacity |
| Single espresso example | 1 | About 30 | Illustrative shot volume, not a mug of coffee |
| Double espresso example | 2 | About 60 | Illustrative shot volume, not a fixed espresso recipe |
The FDA's serving-size guidance defines a nutrition-label cup as 240 mL, with a fluid ounce treated as 30 mL, and lists 12 fluid ounces (360 mL) as the reference amount for prepared flavored or sweetened coffee. The household conversions in the chart use rounded liquid-volume equivalents; the travel and espresso rows are examples of vessels or pours you might choose, not rules for every drink.
Every row describes liquid volume, whether that's brewing water or a finished beverage. None describes the weight of beans, grounds, or instant powder.
Match the number to its job
A measuring cup helps you prepare a recipe. A nutrition-label cup gives manufacturers a standardized basis for declaring a serving. A brewer cup describes the manufacturer's carafe markings, while a drinking mug is the container you own.
That distinction matters when you move between equipment. Don't assume that filling a brewer to its cup mark produces enough coffee to fill the same number of desk mugs. Check the brewer's manual or measure the water held at its marked line.
Practical rule: Choose the row that matches the instruction, not the name you give your mug.
For a portable vessel, Custom Mark's 16 oz cup guide provides additional context for that cup format. Check your actual vessel's capacity and leave room for a lid, milk, or comfortable carrying rather than treating the brim as your normal fill line.
Espresso deserves its own measurement habits. Crema makes a shot's apparent volume less dependable than its weight, so use our espresso shot size guide when your question concerns concentrated shots rather than a mug of brewed coffee.
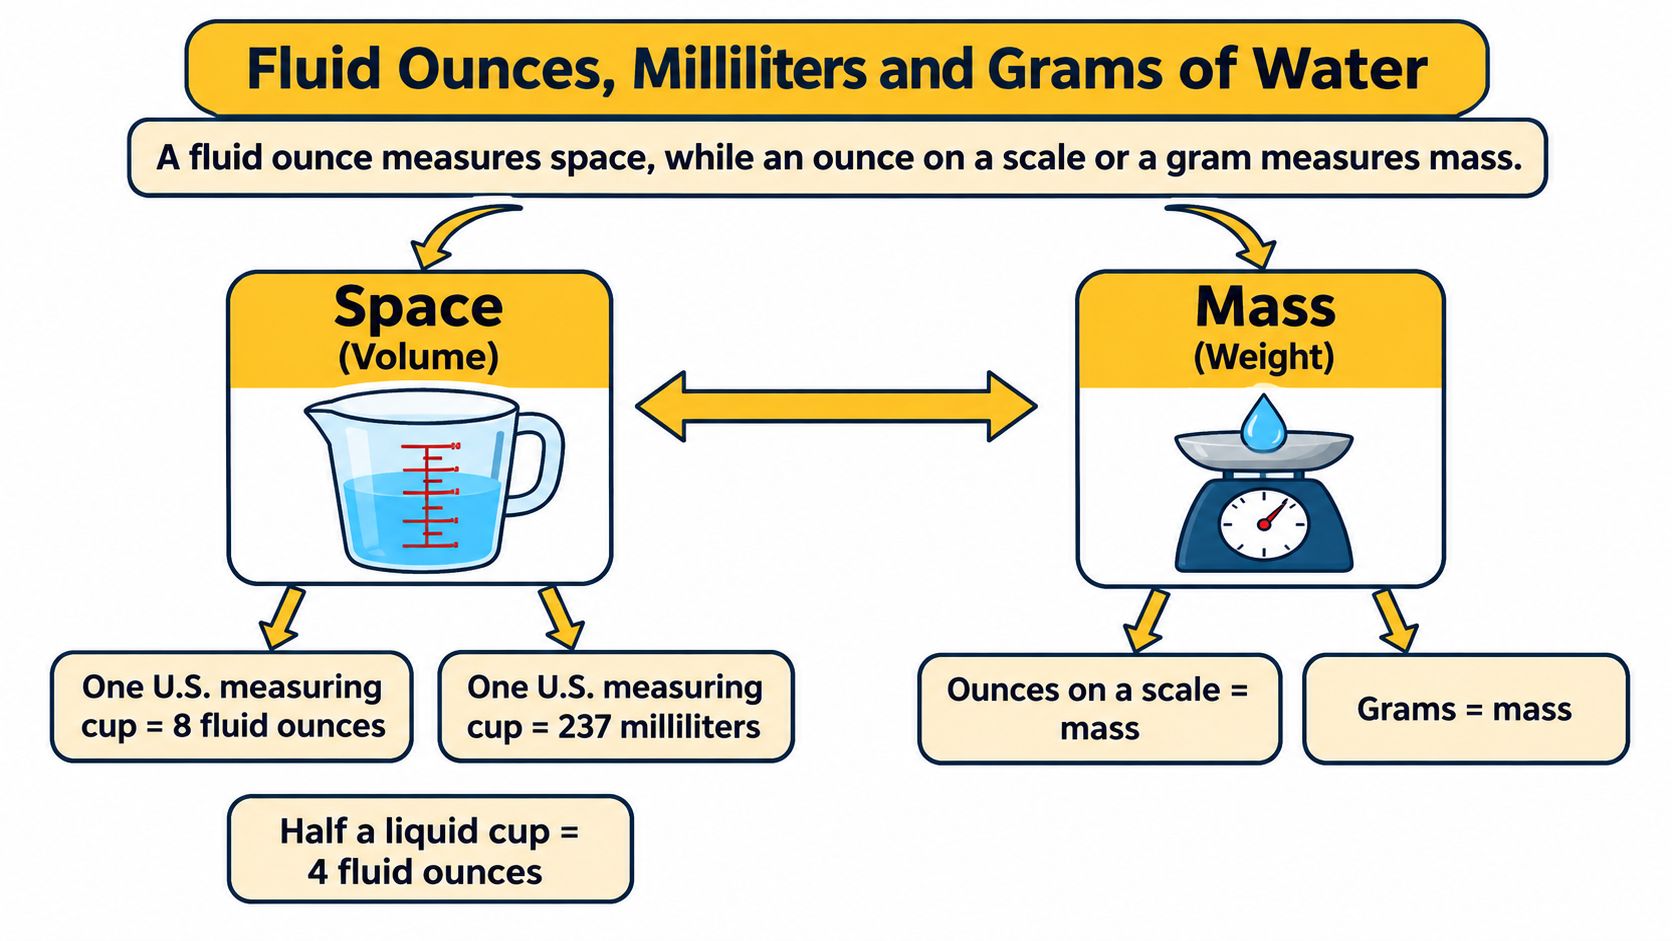
Fluid Ounces, Milliliters and Grams of Water
A fluid ounce measures space. An ounce on a scale, or a gram, measures mass. The National Institute of Standards and Technology conversion table gives a U.S. measuring cup as exactly 8 fluid ounces, approximately 237 milliliters, or half a liquid pint.
Use the following chart for practical water pours. Its gram targets approximate the weight of water, not coffee grounds, and the larger volumes are calculated liquid conversions rounded for kitchen use.
Coffee pours in ounces, milliliters, and grams of water
| Fluid ounces | Milliliters | Grams of water | Rounding note |
|---|---|---|---|
| 1 | 30 | About 30 | Label-style rounded fluid ounce |
| 2 | 60 | About 60 | Illustrative double-shot liquid volume, rounded |
| 5.5 | 163 | About 163 | Short brewer-cup conversion |
| 6 | 177 | About 177 | Traditional coffee-cup conversion |
| 8 | 237 | About 237 | Household measuring cup |
| 10 | 296 | About 296 | Larger mug, lower fill |
| 12 | 355 | About 355 | Household conversion rather than label rounding |
| 16 | 473 | About 473 | Travel-tumbler example |
These are working approximations, not laboratory equivalences. Water temperature affects density, but a gram-based water target is practical for establishing a repeatable coffee pour at home or camp.
Mark an unmarked mug with a scale
A digital kitchen scale with a tare button can turn an unmarked mug into a repeatable measuring tool. Use plain water for this job, before adding coffee or milk.
- Set the vessel down. Place the empty mug or bottle on a stable scale.
- Tare the scale. Press zero so the display excludes the container's weight.
- Pour to your target. Add water until the display reaches the corresponding gram amount in the chart.
- Record the level. Mark a bottle with suitable tape or note where the water reaches inside your mug.
Keep the line below the brim. A vessel filled to its advertised capacity may leave no room to stir or carry it safely.
This same attention to serving definitions helps when you're packing breakfast or a desk snack. Rip Van's guide to choosing high fiber snack bars is a useful companion when planning what goes alongside your coffee; check the labeled serving separately from the package size.
Why coffee doesn't weigh like water
Whole beans leave air gaps. Ground coffee packs differently depending on grind and how firmly you fill the scoop, while instant granules have their own density. You can't transfer a water-volume conversion to any of those ingredients.
The small difference between metric conversions also causes unnecessary confusion. Get Bio Pak describes the modern standard as 8 fluid ounces (236.6 mL) and the traditional coffee cup as 6 ounces. The decimal difference is rounding; the traditional-versus-modern difference is a different serving convention.
Read the ingredient and the unit together. Fluid ounces or milliliters of water tell you how much liquid to pour; grams of coffee tell you what to weigh. Taking a drink's ounce count as the weight of dry coffee would give you a pile of grounds, not a serving recipe.
Coffee Dose for Each Water Volume
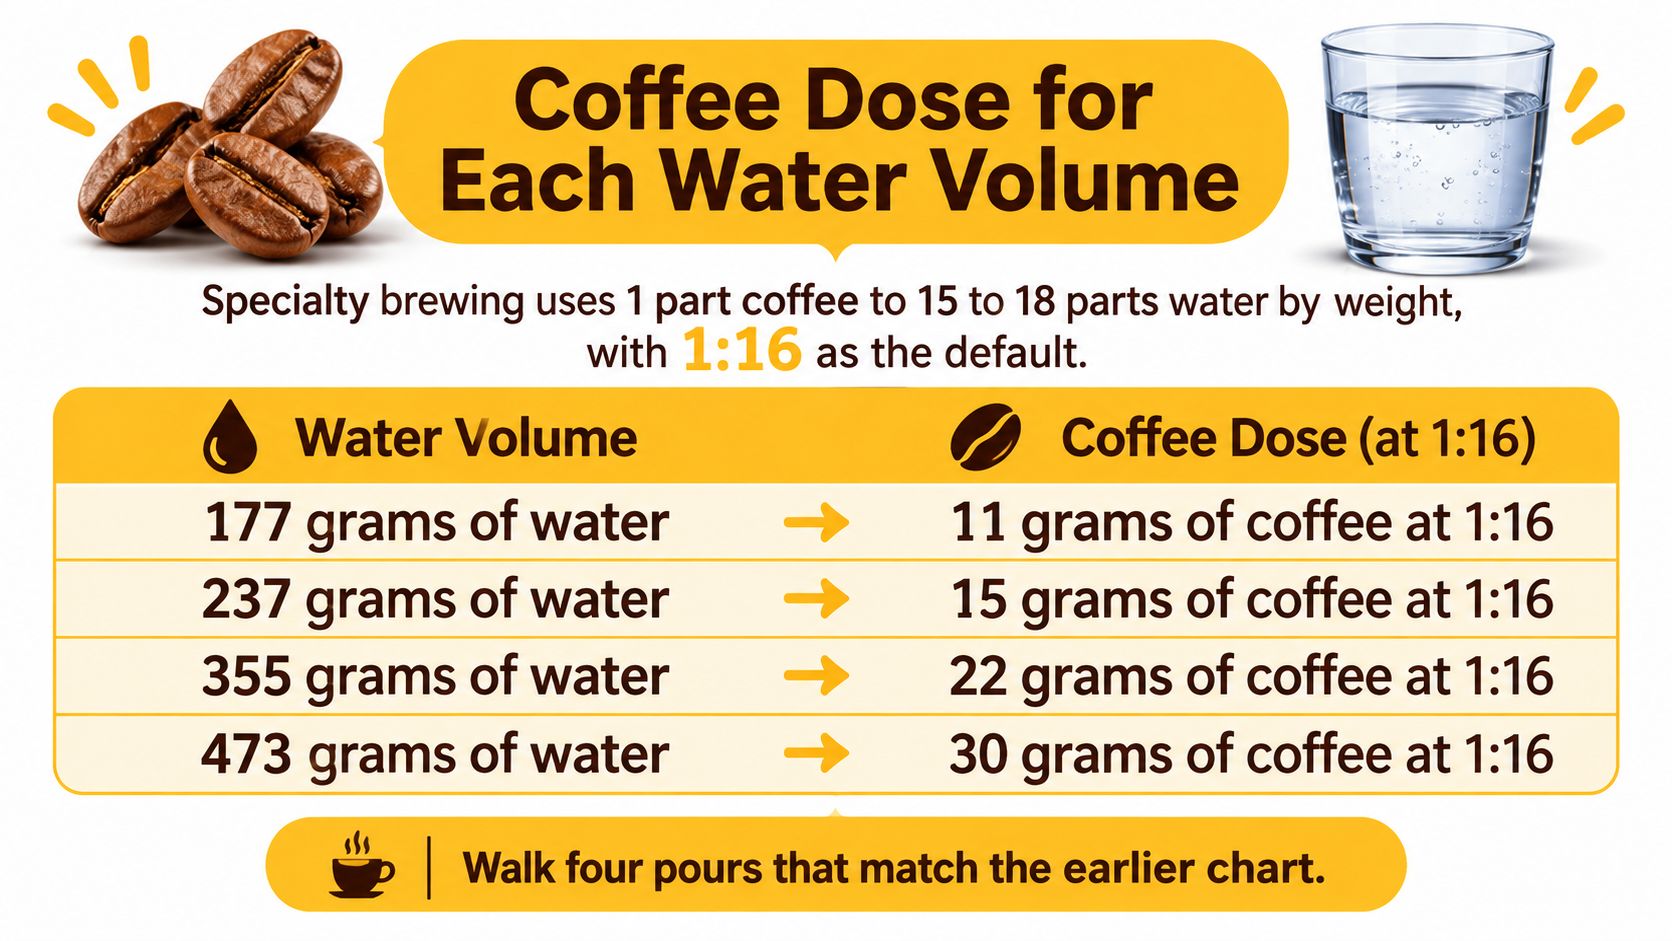
Once you've chosen the water volume, choose a repeatable dose. BaristaHQ distinguishes a 6-fluid-ounce coffee serving from an 8-fluid-ounce U.S. measuring cup, which explains why following a cup-based recipe with the wrong vessel changes the result.
For a worked filter-coffee recipe, use 1:16 by weight: divide your water weight by sixteen to calculate the dry-coffee dose. Treat this as a starting recipe you can adjust, not a universal requirement for every brewer or bean.
Coffee dose by water volume
The filter rows below are calculated examples using that recipe. Spoon estimates are rough backups, not weight conversions; the espresso row is a separate hypothetical recipe.
| Water | Coffee at 1:16 | Tablespoon backup | Style |
|---|---|---|---|
| 6 fl oz, about 177 g | About 11 g | About 2 level tbsp | Classic brewer-cup example |
| 8 fl oz, about 237 g | About 15 g | About 2.5 level tbsp | Measuring-cup pour |
| 12 fl oz, about 355 g | About 22 g | About 4 level tbsp | Desk-mug example |
| 16 fl oz, about 473 g | About 30 g | About 5 level tbsp | Travel-tumbler example |
| Double espresso example, about 36 g out | 18 g in at about 1:2 | Don't dose by tablespoon | Concentrated shot |
Use the scale whenever possible. A spoon measures the space occupied by grounds, and your grind, leveling technique, and coffee can all change how much coffee that space contains.
Change one variable at a time
Say your desk-mug recipe tastes thin. Keep the water at the same marked line and increase the weighed coffee slightly. If it tastes more concentrated than you enjoy, keep the dose steady and add a little water.
For a controlled recipe experiment, you could move toward 1:15 for a more concentrated brew or 1:18 for a lighter one. Those are trial settings, not guarantees of better flavor, and changing dose and water together makes it harder to understand the result.
A repeatable recipe is more useful than a precise-looking scoop count you can't reproduce.
A brewer's batch count needs the same care. For example, a machine whose cup means six fluid ounces would use twenty-four fluid ounces for a four-cup batch, not four household measuring cups. Calculate the dose from the machine's actual water volume rather than its printed cup count.
Keep espresso separate
The espresso example uses the weight of dry coffee going in and beverage coming out. That's different from measuring the water poured into a filter brewer, where some water remains in the wet grounds.
Don't try to fill a drinking mug by extending an espresso extraction. Pull the intended shot, then add water or milk separately if you want a longer drink. Shot weight is the useful control; apparent shot volume can change with crema.
Instant Coffee at Work or Camp
Instant coffee is already brewed and dried, so a filter-ground recipe isn't the right way to dose it. You're dissolving coffee solids rather than extracting flavor from a bed of grounds.
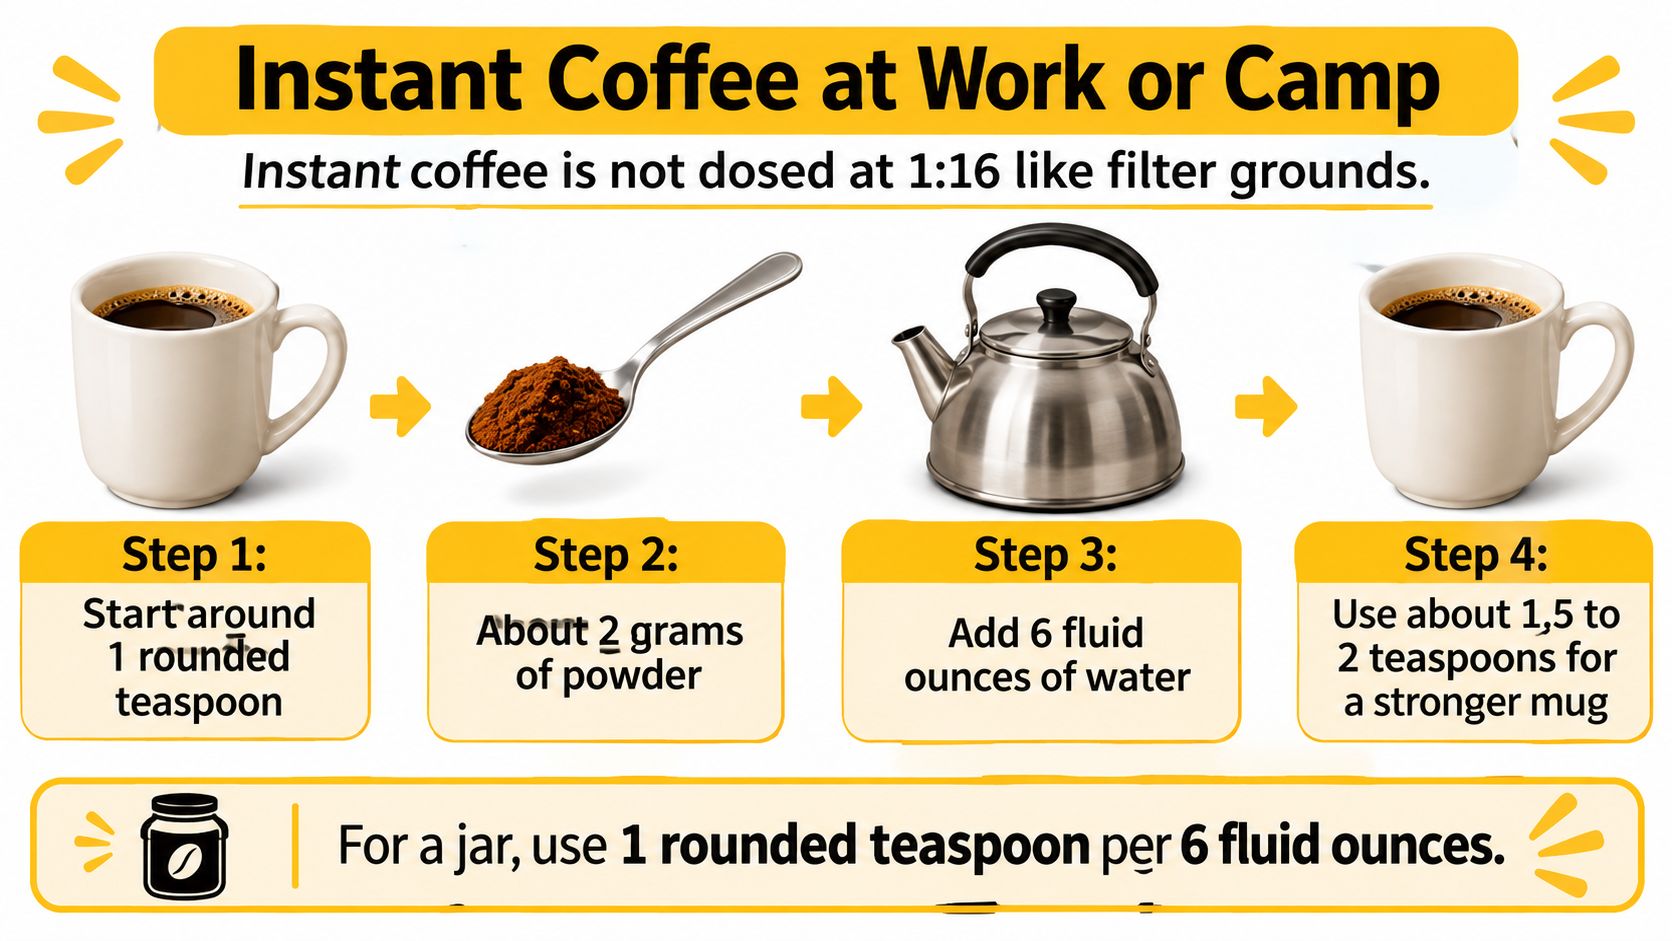
For a jar, use its preparation directions as your first recipe and a measuring teaspoon rather than an eating spoon. Brands differ in granule size and formulation, so there isn't a dependable spoon-to-gram conversion that covers every jar. Start with a level, repeatable measure instead of a heaped guess, then adjust the water after tasting.
The illustration offers a sample jar-coffee starting routine, not a substitute for your product's stated directions.
Use a packet without guessing the pour
Our hot and iced preparation methods work with a mug, bottle, or travel cup. Choose the water amount deliberately instead of filling whatever container happens to be nearby.
- Choose your fill line. Measure the water before heating it, or set aside cold water and ice for an iced drink.
- Open a packet and pour it into your mug, bottle, or travel cup.
- For hot coffee, add hot water and stir until dissolved. Stir along the bottom so no dry coffee remains in the corners.
- For iced coffee, stir the packet with a small splash of water first, then add cold water, milk, and ice.
- Taste before changing anything. If the drink is thin, use less water next time. If it's too concentrated, add a splash and note the new fill level.
A large, unmarked bottle is a common source of disappointment. Pouring a serving into the bottle and then filling it to the top makes the container, rather than your intended recipe, determine the concentration.
Our instant coffee water ratio guide can help you make that adjustment deliberately. Keep the powder measure steady while you find the water level you prefer.
Make the setup easy to repeat
At camp, mark the bottle before leaving home and carry a spoon long enough to reach its bottom. Dissolve the coffee in an open vessel, and follow the container manufacturer's instructions before putting hot liquid into a bottle.
At work, use the same mug and fill line rather than switching between a small kitchen cup and a large desk tumbler. If you're responsible for the shared preparation area, Ring Hot Water's guide to choosing office tea and coffee systems provides equipment-selection context. A convenient water source helps, but a measured pour is still what makes your drink reproducible.
Caffeine When the Cup Gets Larger
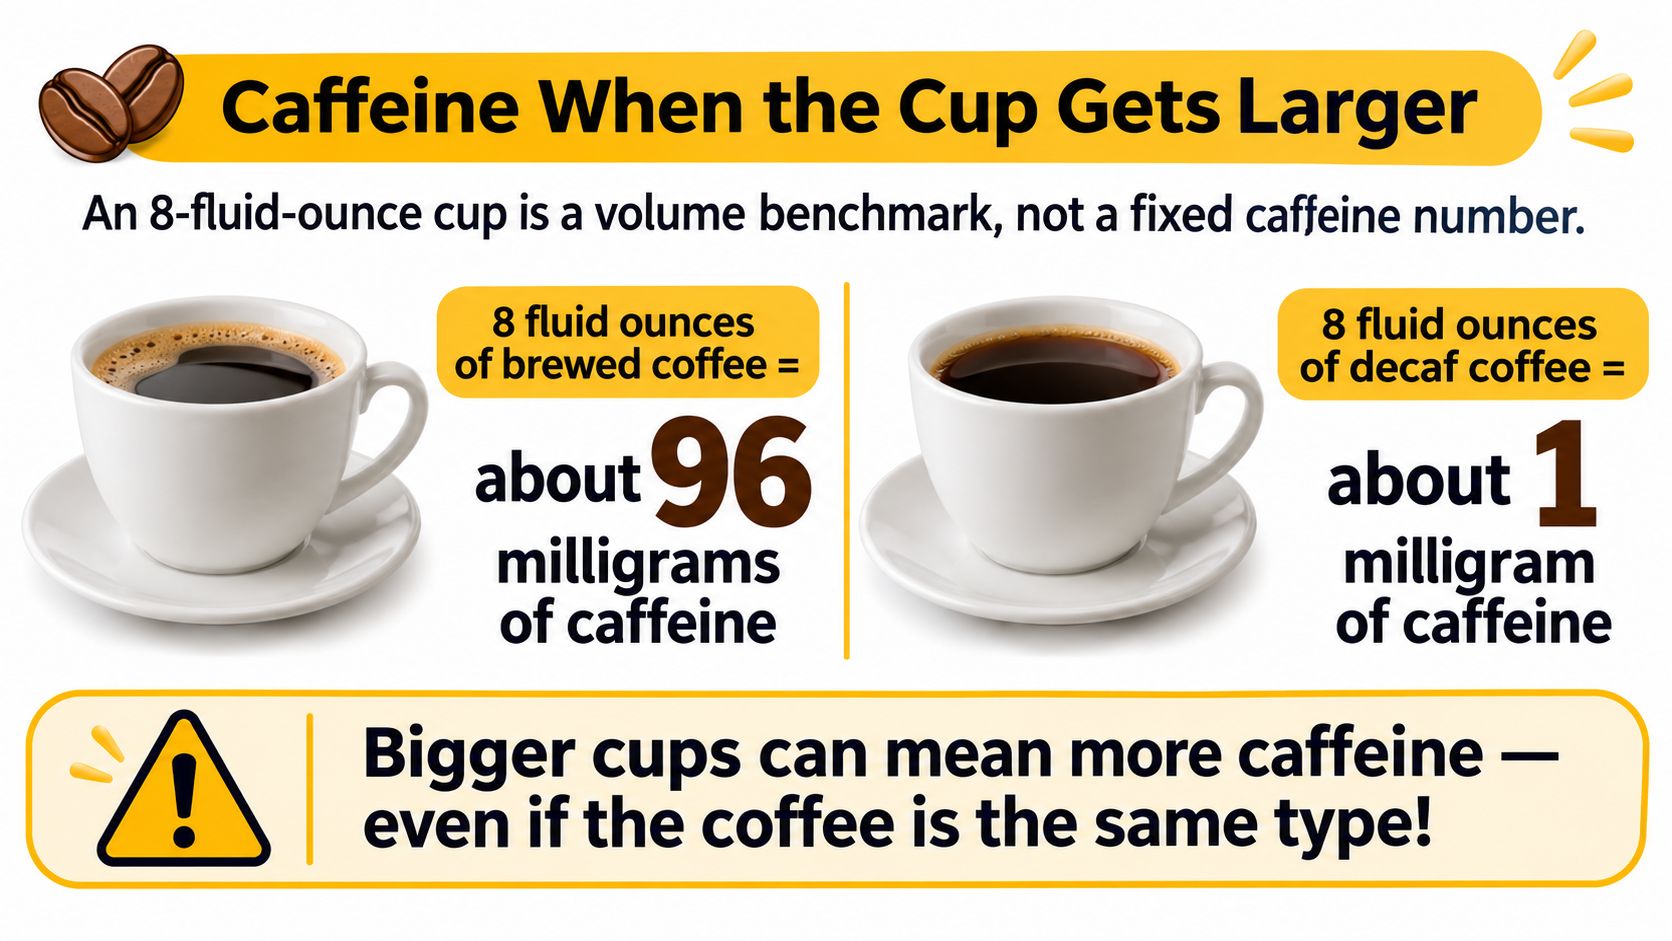
An 8-fluid-ounce cup is a volume benchmark, not a fixed caffeine dose. The Mayo Clinic caffeine guide lists approximately 96 milligrams in 8 fluid ounces of brewed coffee and about 1 milligram in the same volume of brewed decaf.
Those are reference values, not promises about the coffee in your hand. Preparation and product formulation can change the amount, so a cup count alone isn't enough to track intake.
Distinguish a larger serving from dilution
A larger serving of the same brewed coffee contains more caffeine because you're drinking more of that coffee. Adding plain water to an existing serving changes its concentration, but it doesn't add caffeine.
That distinction is especially clear with instant coffee. Dissolving an unchanged amount of powder in more water makes a longer, lighter drink. Increasing the powder along with the water is a different recipe and can increase the caffeine you consume.
A taller mug doesn't tell you the caffeine dose. You need to know what went into it.
For espresso-based drinks, cup capacity is also incomplete information. Added milk or water increases beverage volume without adding another shot. A small concentrated drink and a large diluted drink can therefore contain the same coffee dose.
Read the serving information you actually have
Use these checks when comparing drinks:
- Product information: Look for caffeine information tied to a stated serving or preparation method.
- Coffee amount: Notice whether the recipe uses more grounds, more instant powder, or additional espresso shots.
- Drink composition: Separate coffee from added water, milk, and ice when interpreting the vessel size.
- Personal response: Don't treat a general reference value as a personalized recommendation, especially if caffeine affects your sleep or makes you feel unwell.
Bean variety, preparation, and formulation all matter. Roast names and strong flavor aren't reliable substitutes for a stated caffeine amount.
Our coffee caffeine content guide offers more context for comparing preparation styles. For instant coffee, use the product's stated serving and caffeine information when available rather than assigning every mug the brewed-coffee reference value.
Choose a Cup Size and Brew It
Choose a default fill line you can use without thinking. A shorter pour may suit a quick breakfast, a desk mug may suit your workday, and a portable vessel may suit your commute or trail routine. You don't need to memorize every conversion; you need a mark you can reproduce.
Measure the vessel with water, record the line, and leave enough headspace for stirring and carrying. If you brew grounds, weigh the coffee and keep the water target steady while you adjust flavor. If you use instant, match the prepared serving to a deliberate water level rather than filling the container automatically.
Choose the preparation that fits your day
A scale and brewer make sense when you enjoy preparing ground coffee. A packet makes sense when you want a cup between meetings, don't want to carry a brewer camping, or want an easy organic option at home.
Cartograph Organic Instant Coffee - Medium Roast costs $7.99 USD and is organic freeze-dried instant coffee sold in single-serve packets. Each packet is a measured serving that stays sealed until you're ready to brew, and the coffee dissolves without a grinder, brewer, filters, or cleanup. Its medium roast has a smooth body with subtle notes of chocolate and cinnamon.
- At your desk: Keep a familiar mug and use its marked line instead of estimating a fresh pour each time.
- On the trail: Measure your camp vessel before packing so you can prepare coffee without a kitchen measuring cup.
- At home: Keep your preferred recipe alongside the coffee so another household member can reproduce it.
For product questions, contact our Santa Monica office at (424) 258-4527 or wlochran@cartographcoffee.com. The useful habit is simple: keep the serving consistent, match it to your chosen fill line, and change the water deliberately when you want a different strength.
Our organic freeze-dried instant coffee gives you a measured packet to pair with the cup size you prefer, whether you're at your desk or preparing a camp breakfast. Visit Cartograph Coffee to order, then mark your vessel's water line so your next cup is easier to repeat.