You wake before sunrise to a cold tent, stiff fingers, and a stove that refuses to cooperate in the wind. The first mug of coffee isn't just a caffeine delivery system. It warms your hands, gives the morning a dependable rhythm, and makes the next decision, whether that's breaking camp or walking toward the ridge, feel manageable.
Brewing coffee outdoors forces compromises that don't exist in a kitchen. Water may be limited, your cooking surface may wobble, fuel may matter, and every dirty filter or coffee ground has to be dealt with responsibly. The best method depends less on fashionable gear than on whether you're backpacking alone, sharing a car campsite with family, or running a larger basecamp.
Why Coffee Matters at Camp
Camping exposes the difference between a pleasant coffee ritual and an impractical one. At home, you can weigh beans, adjust a grinder, rinse equipment under a running tap, and start again if the first cup misses. At camp, rain can soak your kindling, wind can cool the kettle, and a single dropped filter can become a surprisingly serious inconvenience.
That pressure makes the morning cup more functional. A simple method that produces acceptable coffee with little cleanup may serve you better than a technically impressive brewer that consumes fuel and leaves grounds stuck in mesh. The right choice preserves the part of the ritual you care about, whether that's aroma, strength, speed, or the quiet act of preparing something hot before everyone else wakes.
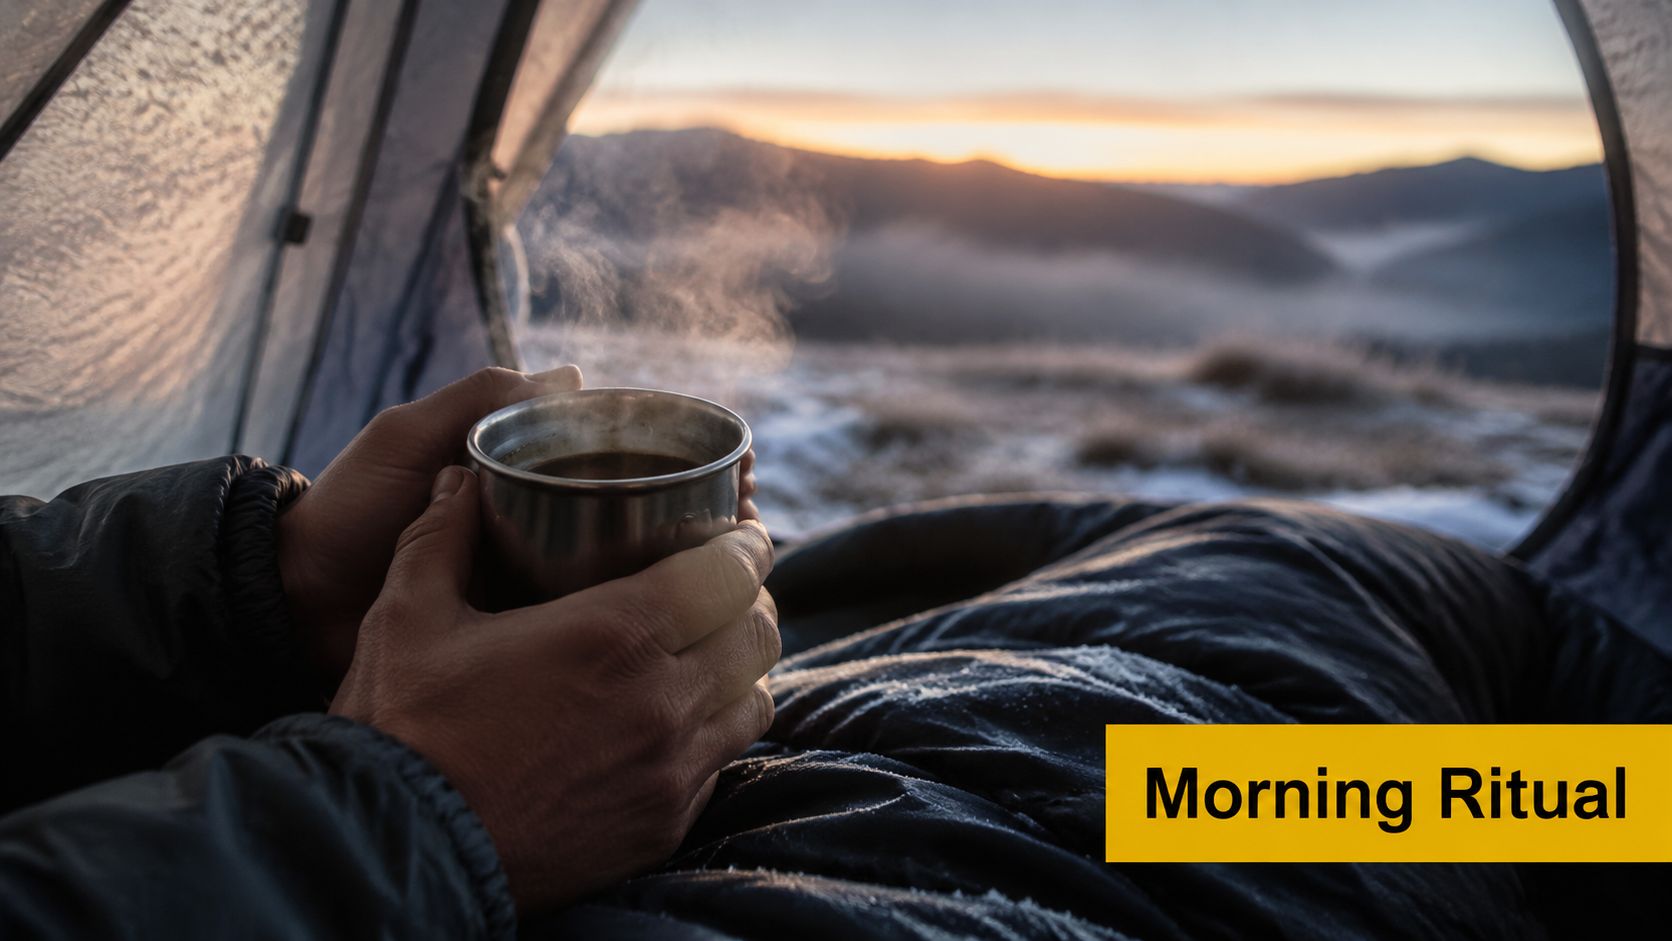
The outdoor coffee habit is older than modern camping
Coffee designed for field conditions has a long history. Camp Coffee was created in Glasgow in 1876 for the Gordon Highlanders, allowing soldiers to prepare coffee during campaigns in India, as documented by the BBC's history of Camp Coffee. It was a portable coffee essence made with coffee, chicory, sugar, and water, and its appeal came from solving a practical problem, not from eliminating the desire for a proper coffee moment.
That same tension still shapes coffee while camping. People want the comfort and flavor of coffee, but they need a format that fits a tent, RV, caravan, or trail kitchen. A 2023 German Coffee Association study found that more than 80% of campers prepare coffee on-site or bring it with them, while around 30% choose soluble coffee during camping (German Coffee Association study). The pattern suggests that campers aren't abandoning the ritual. They're adapting it to field conditions.
If your trip includes a scenic European basecamp, practical planning matters beyond the mug itself. Guides that help you plan your Bled adventure basecamp can make it easier to think through campsite access, cooking space, and the rhythm of mornings before you choose a brewing setup.
The aim isn't perfection at any cost. It's a cup that fits the weather, equipment, group, and effort you're willing to spend.
Choosing the Right Brewing Method for Your Trip
No brewing method wins every camping scenario. Compare each one by the resources it consumes, not only by flavor in ideal conditions.
Five methods under field conditions
Instant coffee has the smallest equipment footprint. You need a mug, hot water, and a packet or container, so it uses no brewing apparatus and creates little cleanup. The trade-off is flavor depth. Quality varies widely, but a good soluble coffee can be the most sensible choice when you're moving early, carrying everything, or rationing stove fuel. Cartograph Coffee's camping-focused coffee guidance is useful when you're comparing instant coffee with brewed alternatives.
A stovetop percolator suits groups that want a familiar, full-bodied pot and don't mind a longer heating cycle. It scales better than single-cup equipment, but it requires sustained heat and careful attention. Leave it over a strong flame too long and the coffee can become harsh, while its bulky shape and wet grounds increase cleanup.
Pour-over gives you control over flow and contact time. A collapsible cone or flat brewer packs efficiently, and paper filters make disposal straightforward. It does, however, demand a stable mug or pot and a reasonably steady pour, which can be frustrating on uneven ground or in gusts. For a family meal plan, pair it with other low-mess provisions such as high-energy vegan food for camping, especially when cooking space is limited.
A French press produces a fuller, heavier cup and can serve more than one person in a single brew. Its disadvantages are weight, bulk, and wet grounds trapped in the mesh. You'll need a way to collect the sludge before rinsing, and that rinse water still needs responsible disposal.
Cold brew is the no-fuel option for warm-weather trips. Prepare it before leaving or during a rest period, carry it in a sealed bottle, and dilute it when you're ready. It won't provide the steaming comfort of a hot drink on a cold morning, but it can be smart for multi-day trips where every stove use matters.
| Method | Weight | Fuel Use | Brew Time | Cleanup | Taste Quality | Best For |
|---|---|---|---|---|---|---|
| Instant | Minimal | Only for heating water | Very fast | Minimal | Convenient and variable | Fast starts and ultralight trips |
| Stovetop percolator | Moderate to high | Sustained heating | Moderate | Moderate to high | Strong, traditional profile | Car camping and larger servings |
| Pour-over | Low | Heating water only | Moderate | Low with paper filters | Clean and adjustable | Solo campers and careful brewers |
| French press | Moderate | Heating water only | Steep and serve | Moderate to high | Rich and full-bodied | Couples and small groups |
| Cold brew | Low | None at serving | Prepared in advance | Low to moderate | Smooth and chilled | Warm weather and fuel-limited trips |
The practical decision is often simple. A solo backpacker usually benefits from instant or a single-serve pour-over because carrying and cleaning a full brewer isn't worth the extra work. A couple at a car campsite may gladly accept a French press because the richer cup justifies the equipment. A larger group needs batch capacity, and that changes the balance toward a percolator or prepared cold brew.
Essential Gear and Lightweight Alternatives
Pack the brewing system as a complete workflow, not as a collection of attractive objects. The kettle, stove, filter, cup, coffee, and cleanup container must work together when your hands are cold and the ground is uneven.
Build the smallest complete kit
For instant coffee, the core kit is a heat source, a pot or kettle, a mug, water, and coffee portions. A small camping pot can replace a dedicated kettle, and the mug can double as the measuring vessel. If you don't need a pouring spout, avoid carrying one.
Pour-over needs a cone or collapsible brewer, filters, and a vessel that can support it securely. A reusable metal filter removes paper waste, but it usually allows more oils and fine particles into the cup and can take more effort to rinse. A clean bandana can serve as an emergency filter, although it may drain slowly and can leave fabric flavor if it hasn't been rinsed thoroughly.
French press equipment combines brewer and serving vessel, but the mesh retains wet grounds. Bring a sealable bag or small container for the spent coffee instead of trying to wash the grounds into the soil. A multifunctional pot can sometimes handle hot water and brewing duties, but test the arrangement at home before trusting it outdoors.
Cold brew needs a leak-resistant bottle. A Nalgene-style bottle can hold grounds and water during steeping, then serve as the storage container, though you'll need a reliable way to filter the finished drink.
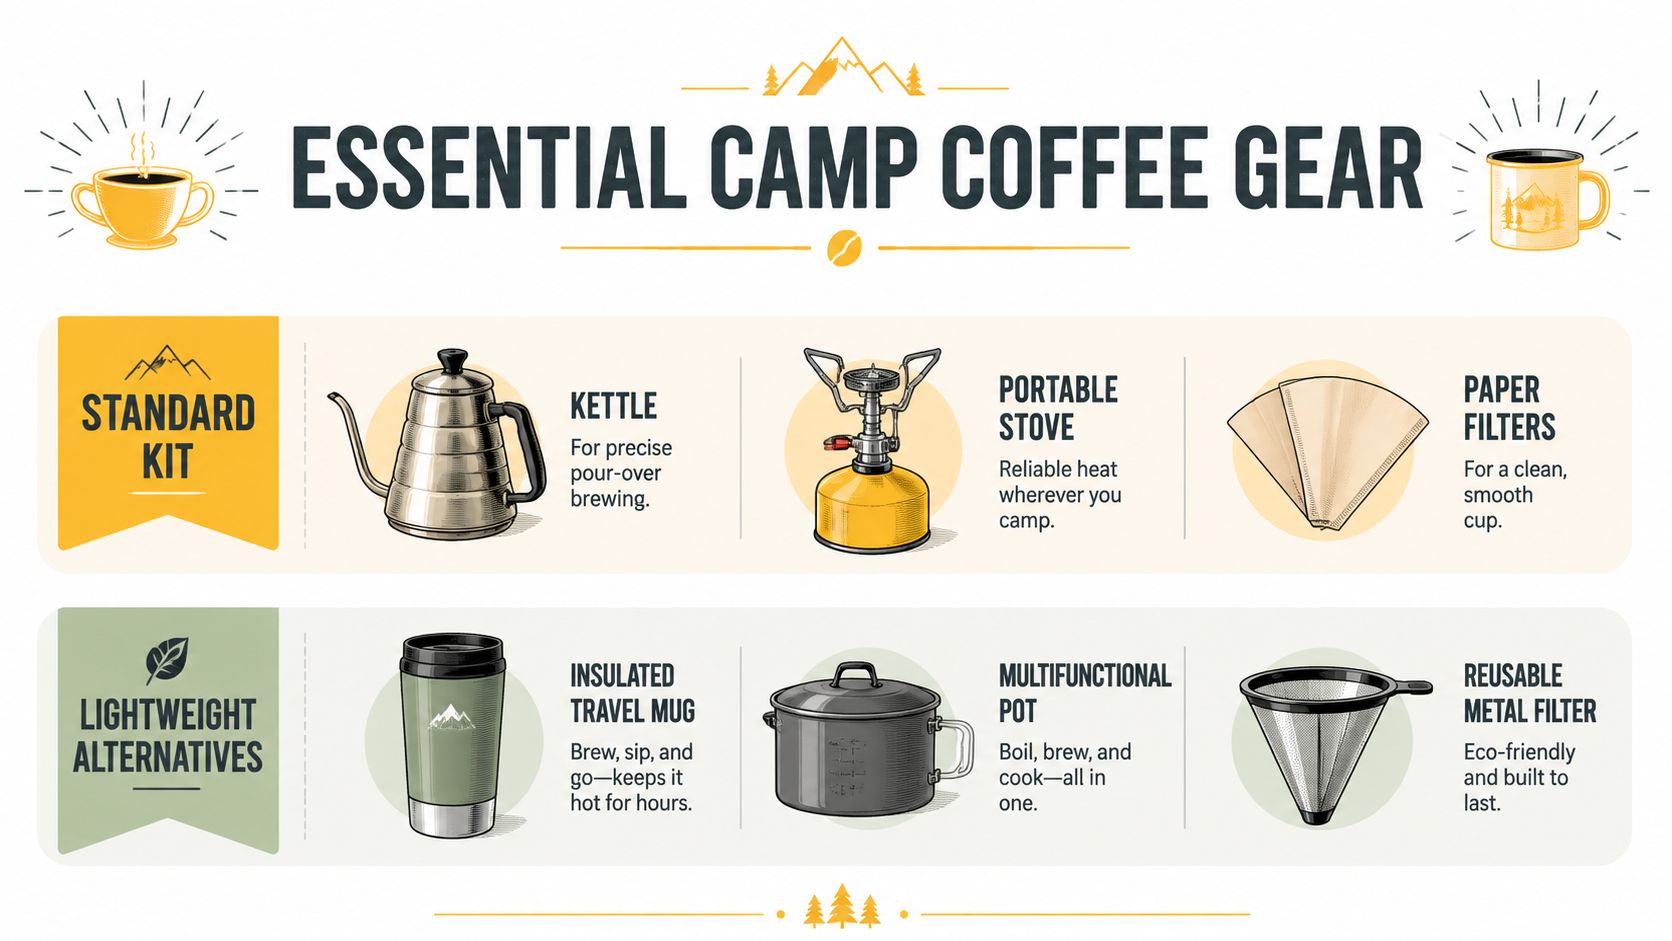
Pack according to the trip
For ultralight backpacking, remove every item that doesn't contribute directly to drinking coffee. Pre-grind the beans, pre-measure portions, and pack filters with the coffee so you don't need a grinder or a separate dosing container. Instant packets reduce both equipment and wet cleanup.
For car camping, weight matters less, so a better kettle, insulated mug, or French press may earn its place. Focus on stability and durability. A broad pot is easier to manage on a picnic table than a narrow vessel balanced on a tiny stove.
For a group expedition, batch size and serving speed matter more than personal brewing precision. Pack a larger pot, a protected coffee container, and a dedicated grounds bag. If several people have different preferences, make a neutral base and let each person adjust strength or milk in their own mug.
Waterproof the supplies before leaving. Coffee absorbs moisture and odors, so use a sealed bag inside your food container. Run the entire process at home, including heating water, pouring, serving, and packing out grounds. That trial reveals loose lids, unstable brewers, filters that don't fit, and cleanup problems while you're still near a sink.
For more ways to reduce clutter and improvisation, these coffee camping hacks are most useful when treated as workflow ideas rather than excuses to carry extra gadgets.
Mastering Water Temperature and Extraction Outdoors
Coffee extracts best outdoors when you control heat instead of boiling harder. The practical target is 195–205°F, or 90–96°C, for camp brewing, according to REI's camp coffee guidance. Bring the water to a boil, remove it from the heat, and wait roughly 30–60 seconds before pouring so the brew enters that range.
Boiling water poured directly onto grounds can produce bitterness and uneven flavor. Cold air and wind also pull heat from the kettle and brewer quickly, so pre-warm the mug or brew vessel with a little hot water before starting. At high elevation, boiling occurs at a lower temperature, which makes a thermometer more useful and may require longer contact time to compensate.
Adjust the variables you can control
Grind size, contact time, and agitation are your main field adjustments. Coarser grounds drain quickly and suit immersion methods that steep longer. Finer grounds extract faster but can clog a filter or create bitterness if they remain in contact with water too long.
Use these practical corrections:
- Sour or thin coffee: Increase heat or extend contact time. The brew is likely under-extracted.
- Bitter or drying coffee: Use slightly cooler water, reduce steeping time, or lessen agitation.
- Weak coffee: Add more grounds before making the grind finer, especially if your filter drains too quickly.
- Muddy coffee: Improve filtration and pour more gently rather than stirring aggressively.
For pour-over, allow a 30-second bloom, then continue with controlled pours that keep the grounds evenly wet. French press generally benefits from a 4-minute steep, followed by a slow plunge. Instant coffee doesn't require extraction, so focus on dissolving it completely and avoiding a mug so cold that the drink loses heat immediately.
A coffee-brewing review found that lowering water temperature from 93°C to 88°C reduced caffeine extraction, and one cited study reported 68% extraction after 4 minutes at 85°C compared with 99% after 2.5 minutes at 93°C (review of coffee-brew studies). Those figures explain why an underheated camp brew can look finished while tasting weak.
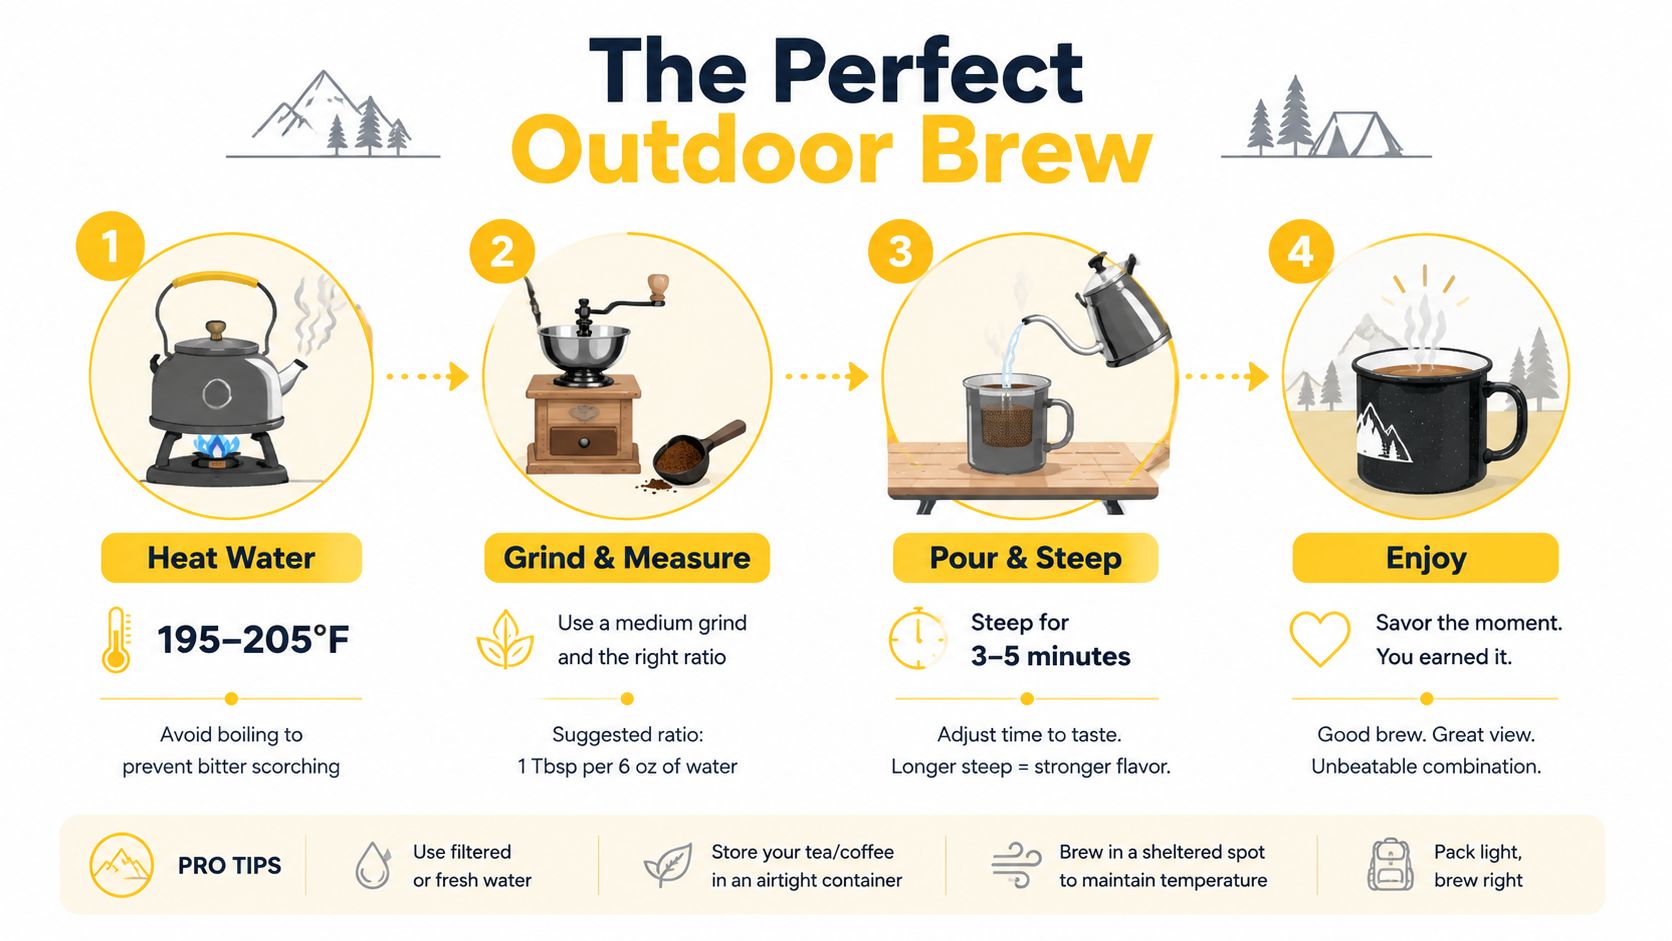
If you're collecting water outdoors, coffee quality starts before heating. Review reliable outdoor water purification methods and ensure the water is safe as well as hot.
A concise reference on the best water temperature for coffee can help you standardize the process before a trip.
Matching Your Method to Trip Type and Group Size
The right method depends on the morning you need, not only the number of cups. Judge three costs together: pack space, stove time, and cleanup. A method that suits a relaxed vehicle camp may be awkward during a cold, windy departure, while a low-fuel option can feel slow when several people are waiting.
Trip conditions can change the decision. In winter, simple equipment and short exposure to hot water matter more than serving a café-style pot. At altitude, boiling and heating can take longer, especially in wind, so a method that requires repeated heating demands more patience and fuel. Warm weather makes prepared cold brew more practical, while rain favors a contained process with fewer loose parts.
| Trip Scenario | Recommended Method | Main Trade-off | Fuel and Cleanup | Best Fit |
|---|---|---|---|---|
| Winter or alpine camp | Instant | Lowest setup, less brewing control | Low fuel and minimal cleanup | Cold, wind, and fast starts |
| Festival car-camping | Instant with a thermos backup | Speed over peak freshness | Low fuel, little washing | Staggered mornings and limited access |
| Family reunion | French press | Shared ritual over easy cleanup | Moderate fuel and more grounds to handle | Several people drinking together |
| Group basecamp | Percolator or prepared cold brew | Batch volume versus preparation time | Percolator uses sustained fuel; cold brew shifts work to the night before | Serving multiple mugs |
| Warm-weather multi-day camp | Cold brew | Smooth preparation, less hot coffee flexibility | No fuel at serving and limited morning cleanup | Fuel conservation and planned mornings |
For a larger group, count the complete sequence rather than the brewer alone. A percolator can serve several people, but it occupies the stove and needs attention while everyone waits. Cold brew removes that morning fuel demand, though it requires preparation, storage, and enough refrigerator or cooler space beforehand. French press coffee creates a shared routine, but the grounds and vessel add washing work.
The same comparison applies to cost. Estimate coffee used per cup, then add fuel consumed and the time spent cleaning. Instant usually minimizes equipment and fuel, while batch brewing can reduce handling per person when many cups are needed. Pre-portioning grounds at home also reduces measuring and keeps small items from disappearing in camp.
A practical rule is to spend effort where the trip benefits from it. Choose a higher-cleanup method for a relaxed basecamp ritual, and accept a simpler cup when weather, altitude, or an early departure makes stove time the larger cost. The best method fits the morning's constraints without creating work the group did not want.
Troubleshooting Common Mistakes and Cleaning Up
Weak coffee usually comes from too few grounds, water that's too cool, or a pour-over that drains before the grounds have extracted properly. Add grounds first, then adjust heat or contact time. Making the grind finer can help, but it may also clog a small filter, so change one variable at a time.
Bitter coffee often means excessive heat or contact. Remove a percolator from the flame instead of letting it continue to boil, and let freshly boiled water rest before pouring. Gritty coffee points to filtration problems, especially with coarse mesh, damaged paper, or a French press plunged too aggressively.
Set the stove on a stable, level surface away from tent fabric. Wind can tip a pot or blow a flame unpredictably, while cold hands make hot-water handling less precise. Keep hot cookware away from tent floors, sleeping bags, and clothing, and use a lid when carrying water across camp.
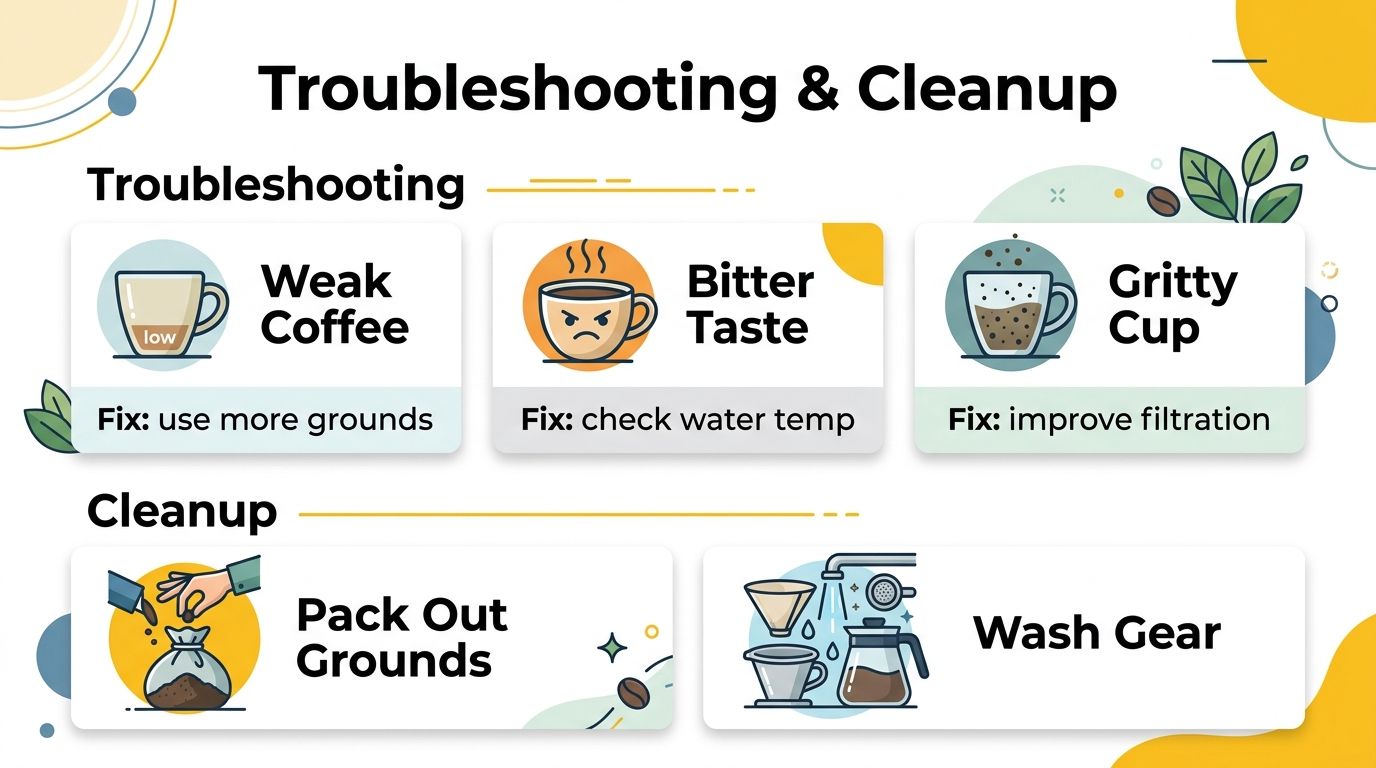
Leave No Trace cleanup
- Collect the grounds: Strain spent coffee into a sealable bag and pack it out. Don't dump grounds into streams, lakes, or the surrounding soil.
- Use minimal rinse water: Clean gear at least 200 feet from water sources, following the cleanup guidance in the plan notes.
- Dispose of wastewater responsibly: Pour it into an appropriate cat hole or sump, away from camp and water.
- Brush rather than soap: Rinse French press mesh and reusable filters with hot water, then use a small brush to remove trapped particles.
Rain, wind, and imperfect equipment will occasionally produce an average cup. That's fine. Coffee at camp is also a pause, a warm object in your hands, and a small morale boost before the day's harder work.
Cartograph Coffee offers organic freeze-dried instant coffee packets that need only hot water, which makes them a practical option for camping when you want to reduce gear and cleanup. Visit Cartograph Coffee to explore a portable coffee format for your next early start.